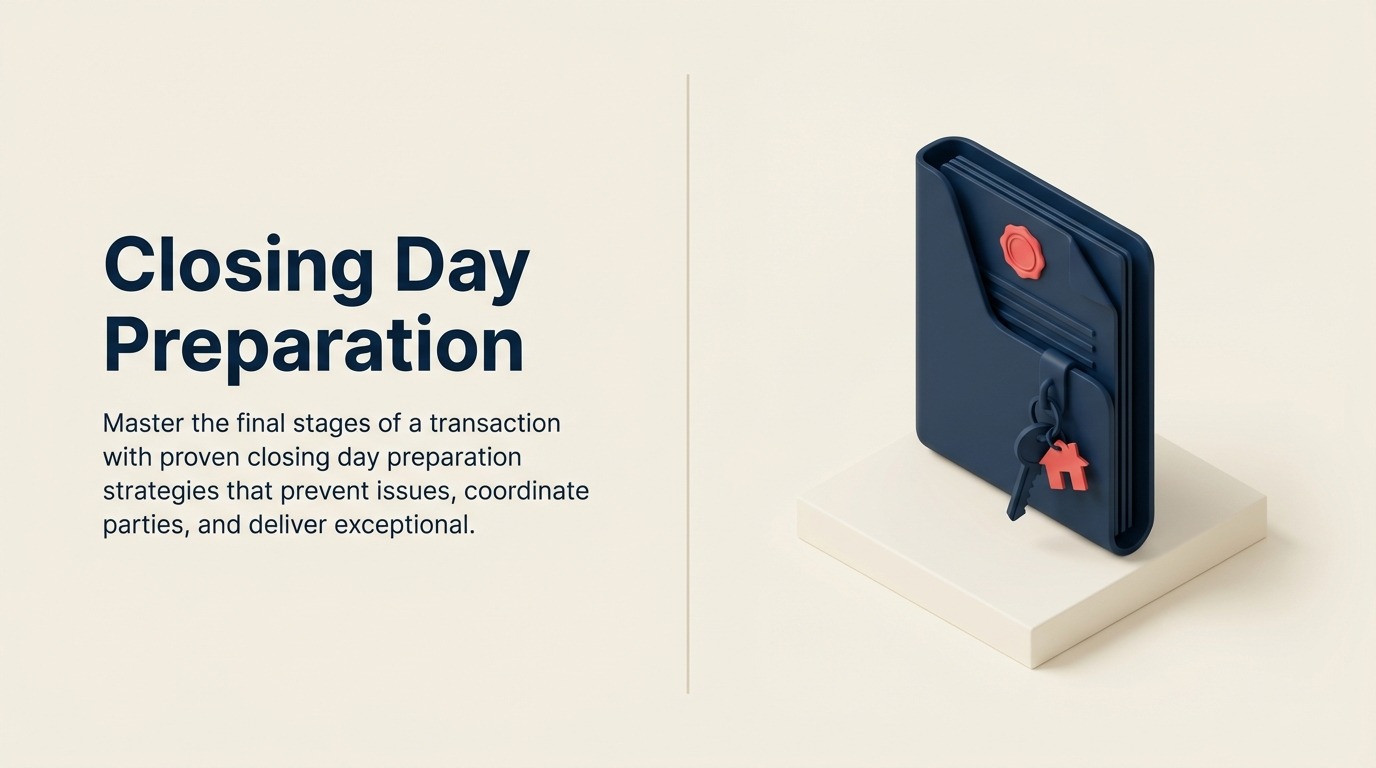
Closing Day Preparation: The Agent's Guide to Flawless Settlements
Turn this article into takeaways for your work.
Each assistant summarizes the article only for you and suggests best practices for your work.
The closing table is where promises become reality. Over the course of weeks or months, you've guided your clients through inspections, appraisals, and financing hurdles. You've negotiated repairs, managed contingencies, and kept everyone aligned. Then comes closing day, that final 48 hours where everything either comes together beautifully or falls apart.
This is where your reputation gets made. A smooth closing creates clients for life. A chaotic one leaves clients questioning whether they made the right choice, even after they've signed the papers. The difference between these outcomes isn't luck. It's preparation, coordination, and careful attention to detail in the days and hours leading up to settlement, the final stage of your contract to closing pipeline.
Why the Final 48 Hours Matter Most
Closing day represents the emotional and financial climax of a real estate transaction. Your clients have committed hundreds of thousands of dollars. They've made life decisions based on this property. They're anxious, excited, and scrutinizing every detail.
This is when small oversights become major problems. A missing document gets discovered at 3 PM on Friday before a Monday closing. The buyer notices something wrong during the final walkthrough and questions the entire deal. Wire transfers get delayed. Title issues surface unexpectedly, all scenarios that effective deal fallout prevention strategies can help you avoid.
But here's what separates top agents from average ones: they don't treat closing day as something that just happens. They plan it. They anticipate problems before they arise. They manage client expectations so well that surprises become rare.
The time you invest in preparation directly translates to client satisfaction, repeat business, and referrals. This is worth your focus.
The 72-Hour Pre-Closing Checklist
Three days before closing, you shift from general transaction management into lockdown mode. Everything that could potentially derail the closing gets identified and resolved. Here's your systematic approach:

72 Hours Before Closing
Start by scheduling your final walkthrough. This inspection, also called the final walk or preliminary inspection, happens within 24 hours of closing, giving you time to address any last-minute issues. Coordinate this timing with your buyer's lender and the title company. You want the walkthrough to happen early enough that you have time to react if problems emerge.
Next, verify utility transfers. Contact the utility companies (electric, gas, water, internet) and confirm that service transfers are scheduled for closing day or immediately after. Create a simple checklist documenting the account numbers and cutoff/activation times.
Request all HOA documentation from the seller's agent or attorney. This includes the HOA estoppel letter, bylaws, rules and regulations, and any pending special assessments. These documents must be reviewed and provided to the buyer's lender before closing. Don't wait until the last minute, this is often where delays originate. Your title and escrow coordination process should already have these items tracked.
Review the final closing disclosure with your buyer. This document (required under TILA-RESPA integrated disclosure rules) itemizes all final loan terms and closing costs. Walk through it line by line. Your buyer should understand exactly what they're paying and why. Clarify any discrepancies with the title company immediately.
Verify wire transfer instructions in writing. The title company will provide wiring instructions for the buyer's down payment and closing costs. Have your buyer confirm they've received these directly from the title company (not through you, which presents fraud risks). Request the wire cutoff time so you know the latest moment funds can be transmitted.
48 Hours Before Closing
Contact your title/escrow company and confirm all parties are cleared for closing. Verify:
- The buyer's final loan approval status
- Insurance commitments received by the lender
- All conditions satisfied
- No new title issues emerged
Request a preliminary closing statement (also called the HUD-1 or CD) from the title company. This shows the projected financial breakdown for both buyer and seller. Review it for accuracy and flag any unexpected charges.
Confirm the seller has satisfied any pre-closing obligations. Has the property been cleared of debris as agreed? Are agreed-upon repairs complete? Are there any outstanding inspection and contingency management items that still need resolution?
Gather security system codes, garage door opener remotes, alarm system instructions, and any other access devices that transfer from seller to buyer. Create a simple transfer document listing these items so nothing gets forgotten.
24 Hours Before Closing
Perform your own detailed document verification. The title company will have prepared the deed, mortgage, promissory note, and various disclosures. Pull together all these documents mentally and confirm everything is accounted for.
Prepare a closing day timeline. Email all parties, buyer, seller, lender, title company, any attorneys involved, with the exact time, location, and parking information for the closing. Include a note about what documents they should bring.
Call your buyer one final time before closing. Confirm they're still on track to wire funds. Remind them what time to arrive at closing. Answer any last-minute questions. This call serves as a final safety net for catching unexpected issues.
Document Preparation and Review
The technical side of closing requires meticulous attention. One misplaced initial or missing signature can derail everything.
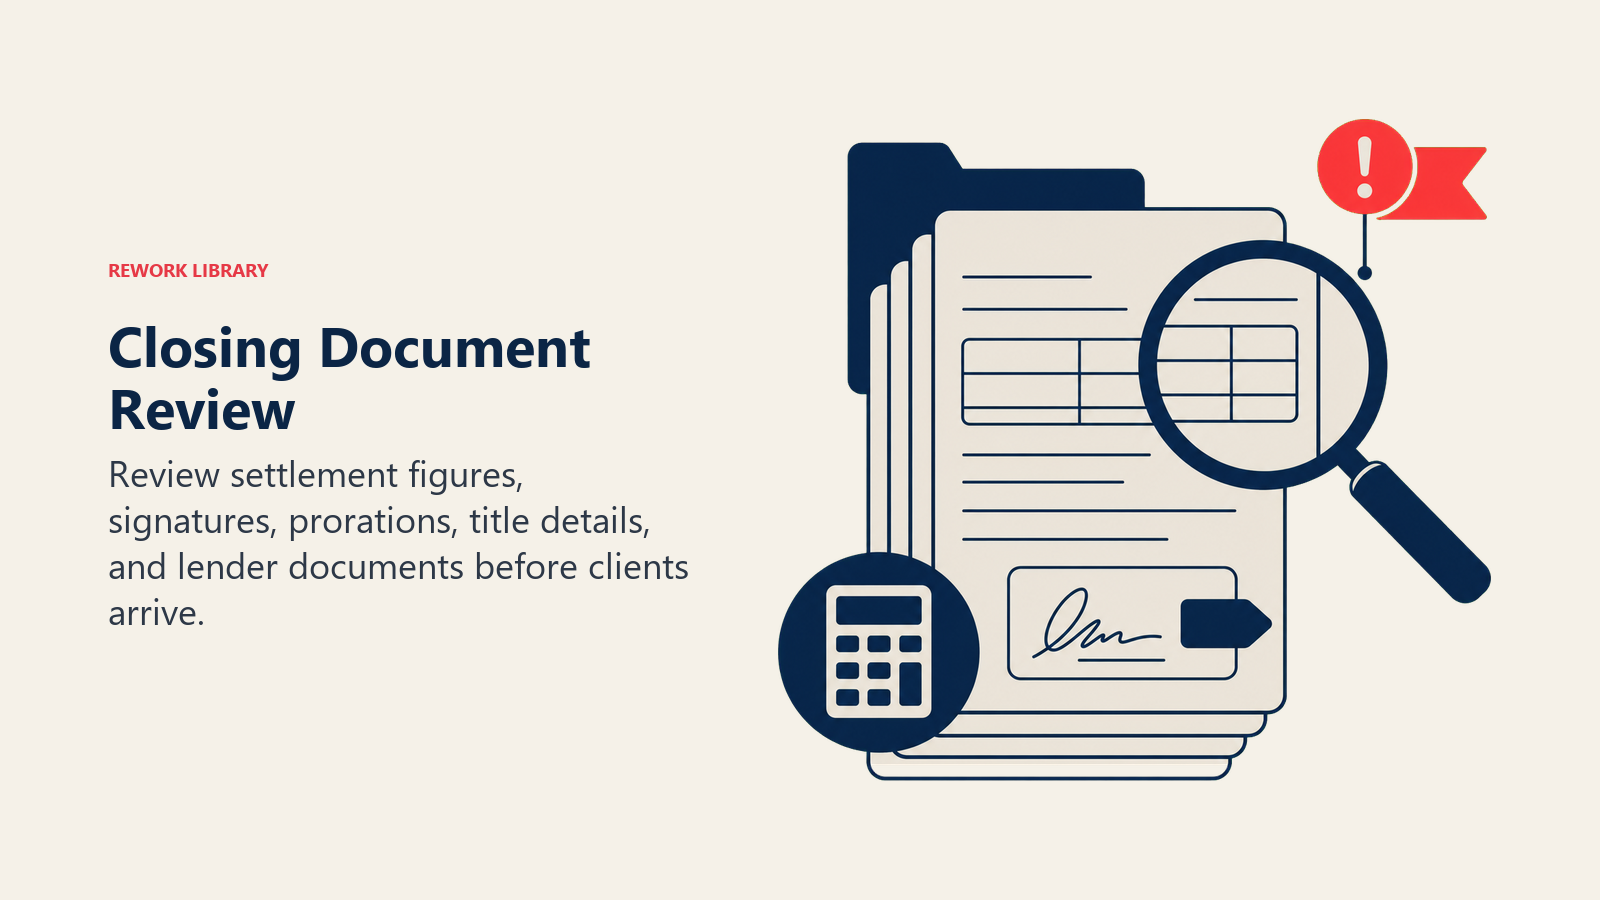
Settlement Statement Analysis
The settlement statement is the financial blueprint of the entire transaction. It shows:
- The purchase price
- All credits and debits for both buyer and seller
- Prorations for property taxes, HOA fees, and utilities
- Title insurance premiums
- Appraisal, inspection, and lender fees
- Your commission (and how it's being distributed)
- The net proceeds each party receives
Review this document at least twice before closing. Check the math on all calculations. Verify that prorations are accurate based on the actual closing date. Look for any charges that seem wrong or duplicate entries. Contact the title company immediately with any questions.
For sellers, the settlement statement often reveals surprises. They may not have realized how many closing costs they're responsible for or how much property tax and utility prorations reduce their net proceeds. Walk through this document proactively with your seller so they're not shocked at the closing table.
Title Policy Verification
The title company issues a title insurance policy protecting the lender and buyer against future title claims. Review the title commitment to ensure:
- The insured parties match what you expect
- The policy amount matches the loan amount (for the lender's policy) and purchase price (for the owner's policy)
- Any exceptions listed in the title commitment have been resolved or are acceptable
- The property description is accurate
If you're unfamiliar with title policies, work with your local title company to understand what coverage includes and excludes. You don't need to be a title attorney, but you should understand the basics.
Deed Accuracy Confirmation
The deed transfers ownership from seller to buyer. It must list:
- Correct legal description of the property
- Correct grantor (seller) and grantee (buyer) names
- Correct signatures and notarization
Any error in names, legal description, or notarization can create problems down the road. Review the deed carefully before closing. If you spot errors, notify the title company immediately so they can correct them before closing.
Commission Disbursement Verification
As an agent, you naturally want to ensure your commission gets paid correctly. The settlement statement shows how your commission is being allocated between your brokerage and any buyer's agent involved. Verify:
- The total commission percentage matches your listing agreement
- The split between listing and buyer's agent commissions is correct
- Your brokerage receives its share
- The funds are being disbursed to your brokerage (not directly to you, which creates compliance issues)
Lien Satisfaction Confirmation
If the seller has a mortgage, judgment, or other lien on the property, that lien must be satisfied (paid off) at closing. The settlement statement should show:
- The amount owed to each lienholder
- Payoff instructions from each lienholder
- The title company's responsibility for satisfying the liens from closing proceeds
Confirm that the title company has received payoff letters from all lienholders and that closing funds are sufficient to satisfy all liens.
Client Preparation Protocol
Your clients are emotionally invested in closing day. They're also often confused about what to expect. Clear communication now prevents panic and misunderstandings later.
Setting Expectations
Send your buyer and seller detailed closing day information 48 hours before closing. This email should include:
- Exact time and location of the closing
- What documents to bring (ID, cashier's check if applicable, etc.)
- Estimated duration (typically 30-60 minutes)
- Overview of documents they'll sign
- Who will be present (title company representative, lender representative if applicable, your broker, etc.)
- Any next steps after closing (keys transfer, utility setup, etc.)
Many agents skip this step because they assume clients understand. Don't make that assumption. Anxious clients appreciate clear information that removes uncertainty.
Required Documents Checklist
Create a simple one-page checklist for each client showing what to bring:
For the Buyer:
- Government-issued photo ID
- Proof of funds (if paying in cash or bringing a cashier's check)
- Homeowner's insurance policy and declarations page
- Any documents the lender specifically requested
For the Seller:
- Government-issued photo ID
- Keys to the property
- Any documents needed for payoff calculations
Email this checklist at least 48 hours in advance. This prevents the scenario where a client shows up to closing without proper ID and creates delays.
Funds to Close Verification
For buyers, closing requires funds, either through a lender's wire transfer or the buyer's own resources. Verify the status:
- If financing: Confirm final loan approval has been given and funds will be wired to the title company by closing day
- If cash buyer: Confirm wire transfer instructions have been provided and funds are available
Create a simple timeline showing when funds must be received. For wire transfers, confirm the cutoff time. Wires sent after 2-3 PM may not process until the next business day, delaying closing.
Identification Requirements
The title company requires government-issued photo ID for anyone signing documents at closing. Passports, driver's licenses, and state IDs all work. Confirm your clients have valid ID at least 48 hours before closing. One client without proper ID can push the entire closing to another day.
Timeline Communication
Create a visual timeline for your clients showing:
- Pre-closing walkthrough time
- Arrival time at the closing office
- Estimated document review and signing time
- Keys transfer time
- Expected departure time
This removes uncertainty and helps clients plan their day. It also sets the expectation that closing shouldn't take all day, it's typically 1-2 hours of actual work.
Final Property Walkthrough Management
The final walkthrough happens within 24 hours of closing. This is your chance to verify that the property condition matches what was promised and that any agreed-upon repairs have been completed.
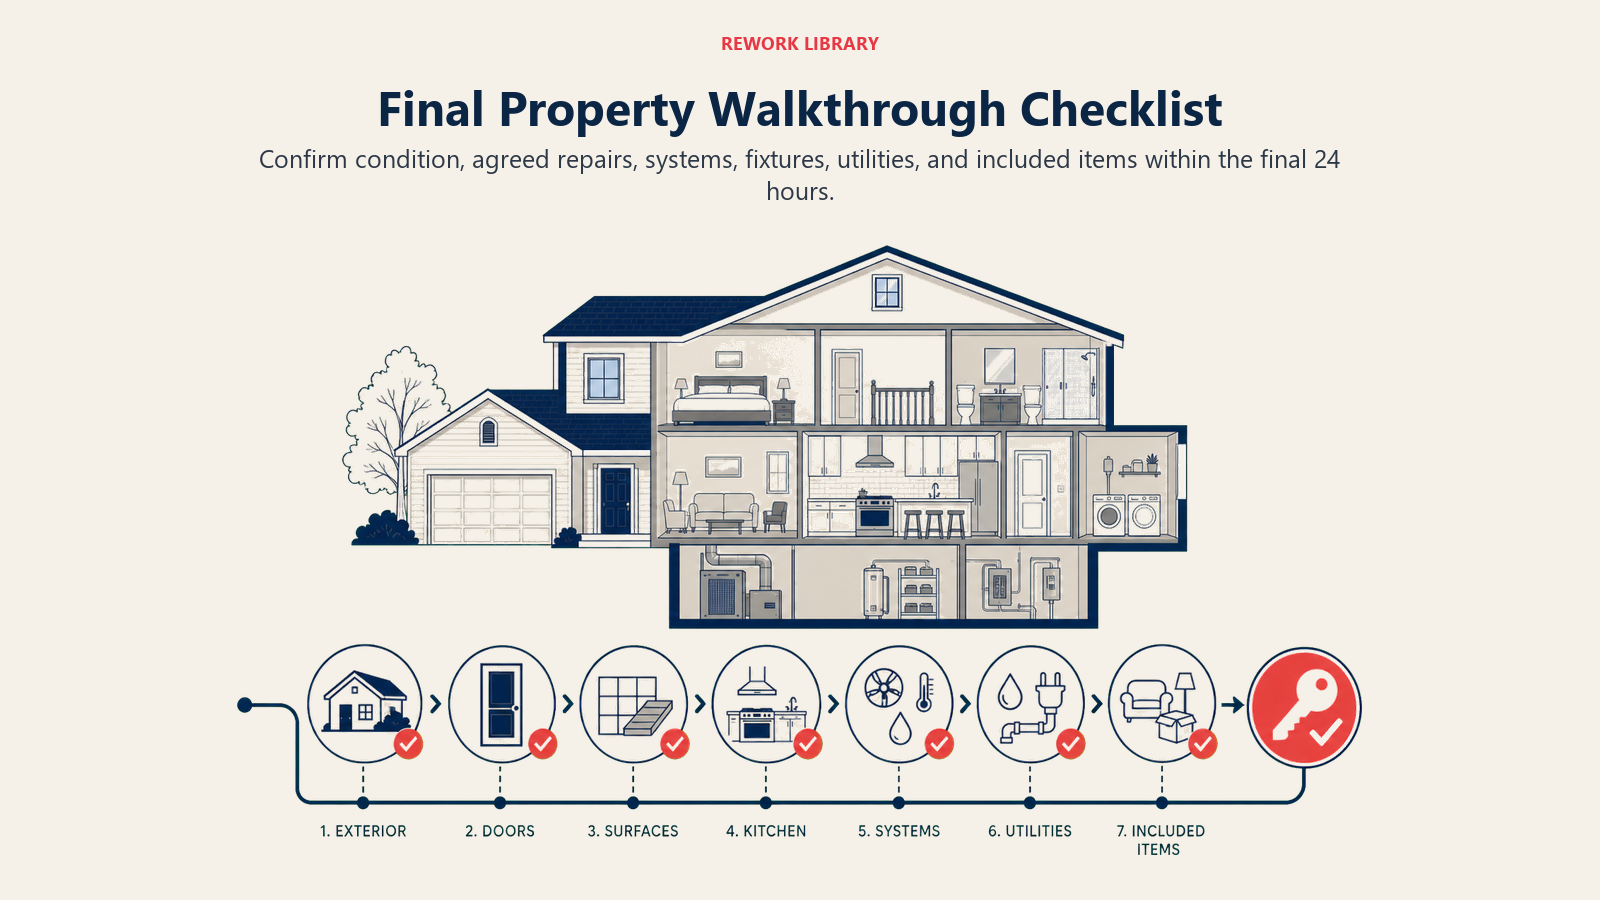
Inspection Checklist Methodology
Use a standardized walkthrough checklist covering:
- Exterior: Roof condition, siding, foundation, landscaping
- Doors and Windows: All doors lock properly, windows close and open, no missing panes
- Interior Surfaces: Walls, ceilings, and flooring are as expected
- Kitchen and Bathrooms: Appliances included as agreed, plumbing fixtures work
- Systems: HVAC units function, water heater operates, electrical panel accessible
- Utilities: Electric, gas, and water are on and functional
Take photos or video as you go. This creates documentation if disputes emerge later.
Agreed-Upon Repair Verification
During the inspection contingency period, you may have negotiated specific repairs or improvements. Verify these are complete:
- Get written confirmation that the work was done (receipt or contractor invoice if significant work)
- Visually inspect the repairs to confirm they're done properly
- Look for any temporary fixes that need to be permanent
If repairs are incomplete or done poorly, contact the seller's agent immediately. You still have time to negotiate resolution before closing, just as you would during the offer preparation and negotiation stage. The longer you wait, the fewer options exist.
Appliance and System Testing
Test major systems and appliances:
- Turn on HVAC and listen for strange noises
- Check water temperature at multiple fixtures
- Test garage door opener
- Verify security system function if included
- Check that included appliances operate
This isn't meant to be a professional home inspection, you're not certifying the property's condition. You're simply verifying that everything included in the sale is functional and matches what the buyer expected.
Issue Documentation Protocol
If you discover problems during the walkthrough:
- Take photos or video showing the issue clearly
- Note the time and date
- Document exactly what the problem is (not interpretations, just facts)
- Contact the seller's agent within 2 hours to discuss
Frame issues as factual observations, not accusations. "The dishwasher isn't running" is documented fact. "The seller neglected the appliances" is an interpretation.
Negotiation Strategies for Discovered Problems
If you discover unexpected issues during the final walkthrough, several options exist:
If the problem is minor and cosmetic, the buyer might accept it. Not everything needs to be perfect.
If the problem is significant but the buyer's move timeline is tight, the seller might offer a credit at closing to allow the buyer to make repairs after taking possession.
If the issue is serious and the seller won't resolve it, the buyer still has the right to walk away at this stage (though this is rare given how close you are to closing).
In most cases, these final walkthrough issues are resolved through quick negotiation. The key is identifying them early so you have time to resolve them before the closing table.
Day-of-Closing Coordination
Closing day arrives. Months of work comes down to this single day. Here's how to execute flawlessly.
Morning Confirmation Calls
On closing day morning, call all parties to confirm they're proceeding as planned:
- Call your buyer 1-2 hours before their scheduled arrival. Confirm they're heading to the closing office.
- Call your seller (if present at closing or receiving proceeds) to confirm attendance.
- Check in with your broker or transaction coordinator to confirm all documents are ready.
- Contact the title company 30 minutes before the first client arrives to confirm everything is prepared.
These calls serve as final safety checks. They catch forgotten documents, miscommunicated times, or last-minute complications before they disrupt the closing.
Closing Location Logistics
Confirm you know:
- The exact address and suite number of the closing office
- Parking location and cost (if applicable)
- Whether the closing company has a receptionist or if clients need to find the conference room
- Restroom locations and other amenities
Send this information to your clients in advance. If the title company office is in an unfamiliar location, give clear directions or GPS coordinates.
Timing Coordination with All Parties
Closing requires synchronization. The buyer needs to be there. The seller needs to be there (or have an attorney represent them). The lender might have someone present for loan document execution. Title company staff must be present.
Stagger arrival times so people aren't waiting around. Typically:
- Seller (or seller's attorney) arrives first and begins signing documents
- Buyer arrives 30 minutes later to sign their documents
- Title company coordinates timing so documents are ready when each party arrives
This keeps people focused and moving rather than sitting around making small talk for 90 minutes.
Document Packet Preview
Before your clients sit down to sign, they should see the closing disclosure and settlement statement one final time. Walk through these documents briefly:
- Show the buyer the loan amount and total closing costs they're paying
- Show the seller their net proceeds after payoffs and closing costs
- Point out where everyone needs to sign
This 5-minute preview prevents surprises when clients open the document packet for the first time at the closing table.
Keys and Access Code Preparation
Immediately before closing concludes, the seller should turn over:
- All keys to the property
- Garage door openers
- Security system codes and instructions
- Any other access devices
Create a simple transfer document where the seller lists all keys and access devices being transferred. Both parties sign this. It prevents disputes about missing keys after closing.
Common Closing Day Issues and Solutions
Despite your preparation, unexpected issues sometimes emerge. Here's how to handle the most common ones.
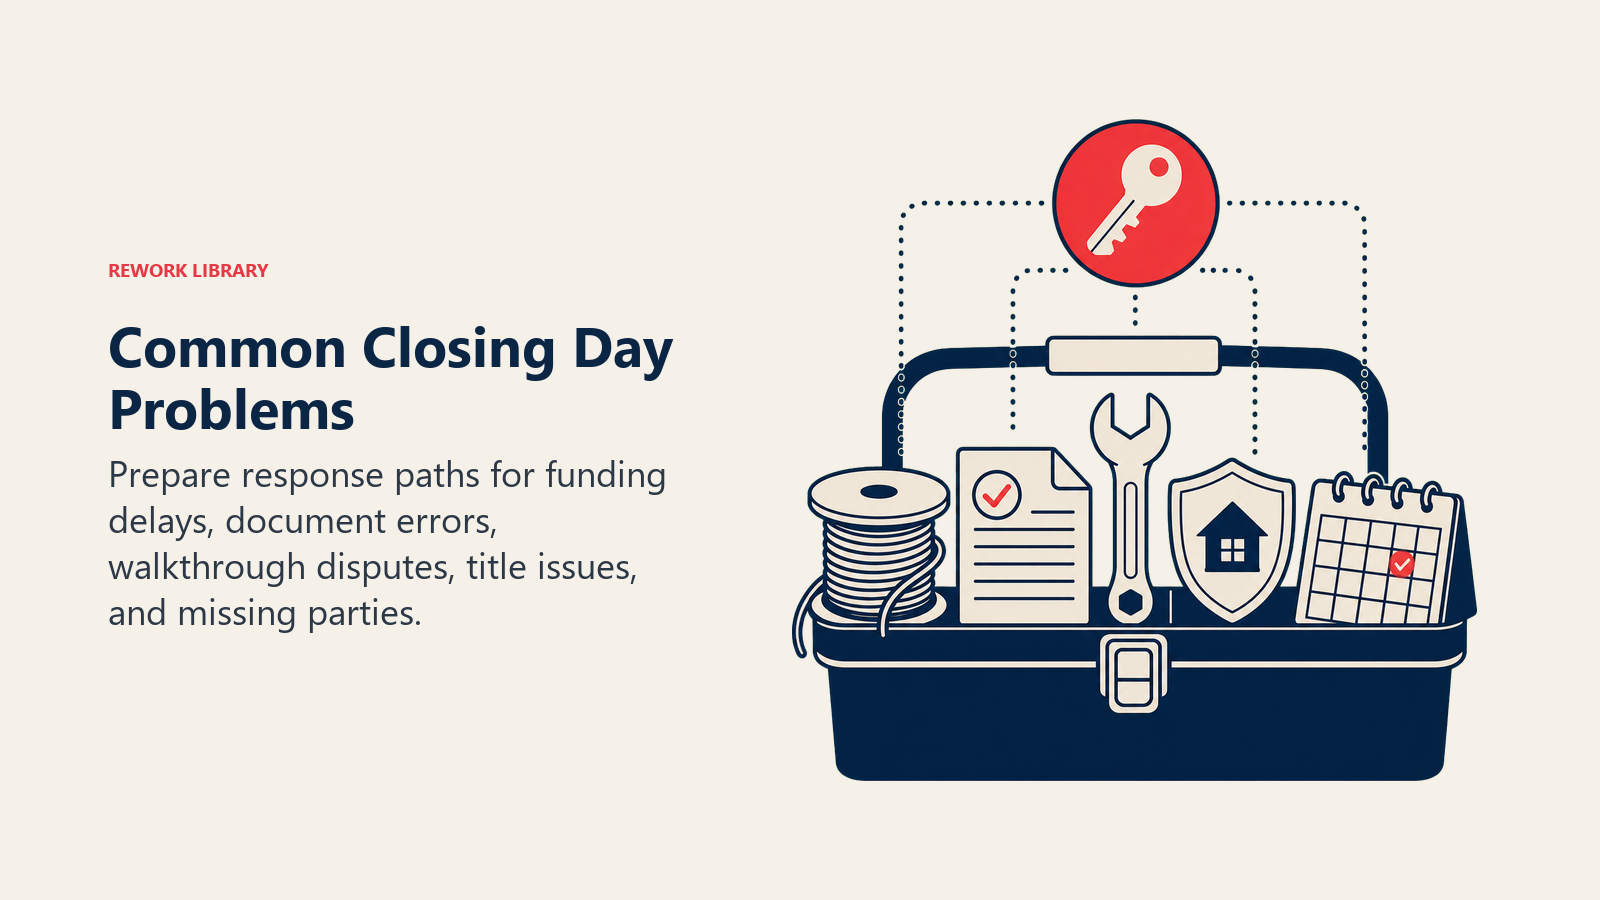
Funding Delays
The buyer's lender is supposed to wire closing funds to the title company by closing time. Sometimes the wire doesn't arrive:
Prevention: Contact the lender 24 hours before closing to confirm wire has been initiated. Get the wire reference number. Request confirmation the wire hit the title company's account.
If it happens: Contact the lender immediately to locate the wire. Most delays are simple transmission issues resolved within hours. The closing can often proceed with the promise that funds will arrive within 24 hours, with the title company holding the documents in escrow.
Last-Minute Title Problems
A title issue you thought was resolved suddenly reappears. Perhaps a lien wasn't released or a document wasn't recorded properly.
Prevention: Maintain constant contact with the title company in the 48 hours before closing. Ask them to flag any outstanding issues immediately.
If it happens: Work with the title company to determine whether the issue blocks closing or can be resolved within days using title company escrow procedures. Most title companies can proceed with closing if a minor title defect is covered by insurance.
Missing Documentation
A client forgot a required document. The buyer doesn't have their homeowner's insurance declarations page. The seller can't find the HOA estoppel letter.
Prevention: Email your checklist 48 hours before closing. Call clients the morning of closing to confirm they have everything.
If it happens: Determine whether the document is actually required before closing or if it can be provided after. Insurance, for example, might not need to be finalized on closing day if the lender is okay with a brief delay.
Walkthrough Discrepancies
The buyer's final walkthrough revealed something unexpected, an agreed-upon repair wasn't done, or the property condition is different than expected.
Prevention: Conduct the walkthrough far enough in advance (at least 24 hours) that you have time to address issues.
If it happens: Contact the seller's agent immediately. In most cases, these issues are resolved through credits, deposits held at closing, or the seller's agreement to complete repairs within a specific timeframe after closing.
Buyer's Remorse
As closing day approaches, some buyers get cold feet. They start questioning the purchase, worrying about the mortgage, or getting anxious about the neighborhood. This is a natural part of the buyer journey stages.
Prevention: Normalize the anxiety in your pre-closing conversations. Let them know this nervousness is common. Reinforce the reasons they chose this property.
If it happens: Listen to the buyer's concerns without dismissing them. In most cases, the anxiety passes once they walk through the closing process. If the buyer wants to back out, they need to understand the financial consequences of doing so at this stage.
Post-Closing Immediate Actions
Closing doesn't end when everyone leaves the closing table. You have critical tasks in the immediate hours and days after.
Keys and Garage Door Openers Transfer
Confirm the buyer has all keys and that they work. Test the garage door opener (if applicable) to make sure it operates the buyer's opener, not a universal one the seller might replace.
Security System Information
If the property has a security system, ensure the buyer receives:
- How to arm and disarm the system
- The security company's contact information
- Codes for any keypad locks
- Instructions for changing the access code
Provide this information in writing so the buyer can reference it later.
Warranty Documentation Handoff
Gather and provide the buyer with:
- Any appliance manuals and warranties that transfer with the property
- HVAC warranty information if the system is relatively new
- Roof warranty if available
- Any other product warranties or guarantees
Organize these documents in a simple folder or digital file the buyer can access.
Service Provider Contact List
Compile a list of service providers useful for new homeowners:
- Plumber, electrician, HVAC technician recommendations
- Lawn care services
- Pool service (if applicable)
- Local utilities contact information for billing and service questions
This simple document positions you as a valuable resource beyond the sale.
Follow-Up Appointment Scheduling
Send the buyer a follow-up email within 48 hours of closing asking how the move went and whether they have any questions about the home or local services. Offer to meet for coffee or a call within the first 30 days.
This follow-up builds the foundation for repeat business and referrals. Most clients appreciate the attention and feel valued beyond just the commission. This is the first step in your client retention strategy and referral generation system.
Wrapping Up
Closing day is the final impression you make with clients. A smooth, well-organized closing confirms their trust in you. A chaotic one leaves them wondering whether they made the right choice in selecting you as their agent.
The difference between these outcomes isn't complicated. It's systematic preparation. A 72-hour pre-closing checklist ensures nothing falls through the cracks. Clear client communication removes anxiety and confusion. Careful document review catches errors before they become problems. And day-of coordination brings all parties together so everything runs smoothly.
This level of execution takes more time than many agents want to invest. But it's exactly this investment that builds a reputation for reliability, creates clients for life, and generates the referral business that sustains a career. These operational fundamentals contribute directly to the real estate metrics and KPIs that measure your success.
Your clients won't remember most of the work you did to get them to closing day. But they will remember how closing day felt. Make it feel controlled, professional, and handled with care. That's the closing day reputation worth building.
Learn More
Ready to strengthen your entire transaction process? Explore these related resources:
- Transaction Coordination Process - Build a comprehensive system for managing deals from contract to close
- Deal Fallout Prevention - Identify and eliminate the most common reasons transactions fail
- Appraisal Process Management - Navigate one of the most critical closing contingencies with confidence
- Past Client Marketing - Turn your successful closings into ongoing relationships and referrals

Senior Operations & Growth Strategist