The anatomy of a well-designed process: SIPOC framework
Designing a process is the first serious step toward operational excellence. It’s the stage in Business Process Management (BPM) where structure begins, where you intentionally define how work should flow to achieve a consistent result. Not in diagrams yet, not in tools – but in logic, roles, outcomes, and rules.
The Design stage: What is it for?
The purpose of process design is to create a coherent, logical structure for turning inputs into valuable outputs. It defines the steps, the roles involved, the decisions along the way, and what “good” looks like.
By the end of this stage, what you get is a clearly defined version of the process that can be modeled, documented, and followed – ideally with performance in mind. It answers questions like:
- What triggers this process?
- What’s the desired result?
- Who is involved, and when?
- What rules govern the flow?
A well-designed process reduces ambiguity, minimizes unnecessary effort, and enables faster onboarding, delegation, and improvement.
Signs your process needs redesigning
In many companies, especially small and growing ones, processes evolve by habit. People just do what works – until it doesn’t. Here are some signs that a process has grown messy and needs to be intentionally rethought:
- Outcomes are inconsistent – sometimes it works, sometimes it fails.
- Instructions live in people’s heads, not in shared knowledge.
- New hires struggle to learn the workflow without constantly asking for help.
- Employees constantly “fix” things manually or use workarounds.
- No one owns the whole flow – each person just handles their part, but no one sees the end-to-end picture.
- You hear “We’ve always done it this way” when questioning a step’s purpose.
When these symptoms show up, it’s not just a documentation problem. It’s a design problem. The process either doesn’t exist clearly enough to follow or has grown bloated and confusing over time.
(Note: You will walk through these signs again – in a more structured way – in the last Optimize stage, where it's all about Redesigning the defined processes.
How to identify which processes to design
We know – there’s no way you’re able to do a whole makeover, and not every process in your business needs urgent redesign. The key is to focus on the few that matter most, starting from your value-creating flows.
Start with the value stream
Zoom out. Ask yourself: How does value flow through our business? From the first touchpoint with a customer to delivering the final result, what are the big stages?
Answering these, and you will come up with the core processes (if you remember it from out first article). This is your value stream – the backbone of any organization. Examples of value streams:
- A retail business: Sourcing → Inventory → Sales → Delivery → Payment
- A services firm: Marketing → Lead capture → Client onboarding → Service delivery → Feedback
- A manufacturer: Order intake → Production planning → Assembly → Quality check → Dispatch
Each of these large stages contains smaller processes that can be independently designed and improved.
Use a value stream map to outline these flows from end to end. This will give you a high-level view of your operation and help you spot weak points.
Decompose into smaller processes
Once you see the major stages, break them into discrete, manageable processes, each of which should have separate inputs and produce a clear outcome.
For example, under “Sales,” you might identify:
- Lead qualification
- Proposal development
- Contract negotiation
- Handover to operations
These are your candidates for design.
Prioritize with the Impact-Effort Matrix
Once you've identified and broken down your key processes, it's time to decide which ones deserve your attention first. Not all processes are equally urgent or worthwhile to redesign. Some are high-friction and high-visibility. Others may be running inefficiently in the background, but don't significantly impact your outcomes.
To make this decision clearer, use the Impact-Effort Matrix – a simple tool that helps you weigh the potential benefit of redesigning a process against the effort it would take to do so.
Start by listing candidate processes and ask two guiding questions:
Impact: If we redesign this process, how much will it improve customer experience, reduce costs, or make operations smoother?
Effort: How much time, resources, or change management will this redesign require?
Then, plot each process on the following grid.
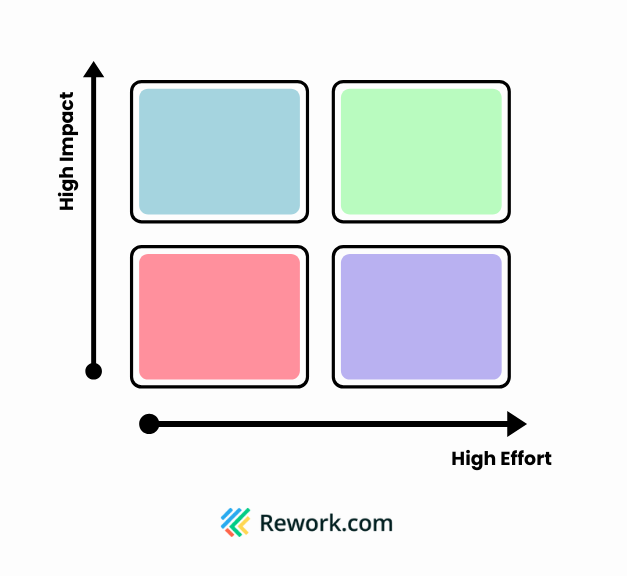
Among these for quadruples, look for the quick wins first: the high-impact processes that create headaches but are simple enough to fix. These build momentum, confidence, and reduce your pains quickly.
On the other hand, high-impact, high-effort processes might become larger initiatives you need to pay attention to later on.
However, remember that sometimes, the most broken processes are not the most obvious. Here’s how to spot them:
- Ask your frontline staff: “What’s one task you dread doing every week?”
- Look at customer complaints: Are they related to fulfillment, onboarding, billing?
- Observe repeated workarounds: Are spreadsheets used where there should be systems? Are approvals always late?
- Audit your touchpoints: Where do you frequently apologize to customers or vendors?
These signals often reveal processes that are worth a redesign.
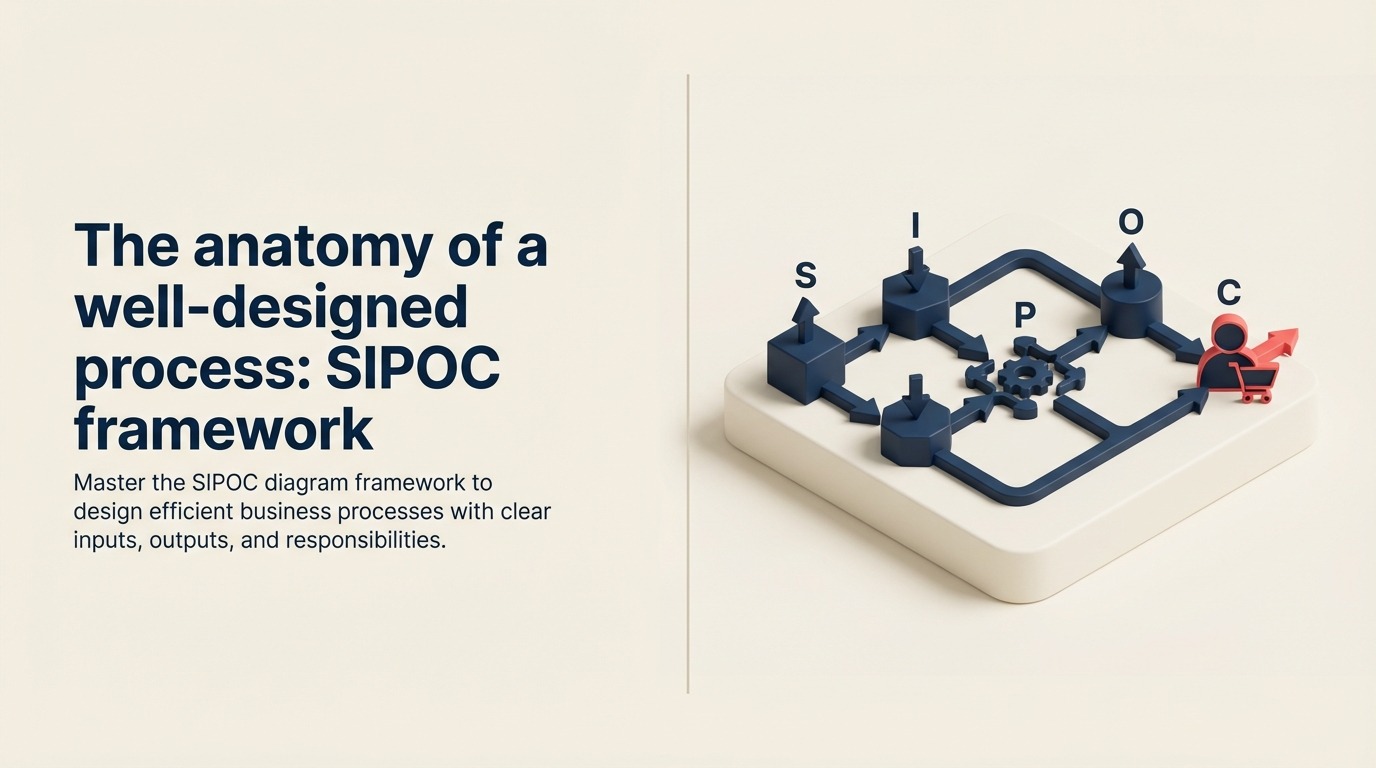
Steps to design a process - SIPOC framework
A process may involve many details that can get you lost when designing. But a simple framework like SIPOC can lead the way.
Originally used in quality and Six Sigma practices, SIPOC is a high-level tool that helps you define and structure a process before you dive into documentation or automation.
SIPOC stands for:
- S – Suppliers
- I – Inputs
- P – Process
- O – Outputs
- C – Customers
By working through SIPOC, you can clarify the purpose, scope, and logic of a process before drawing a sophisticated diagram.
Let’s take an example of designing the Production Handoff process, which begins once a customer confirms their order and ends when that order is formally handed over to production, using SIPOC as the guideline.
Customer – Who is the process for?
Start with the end in mind. Identify the customer who benefits from this process.
- Is the customer internal (e.g. another department) or external (e.g. a paying client)?
- What do they need from this process?
- What will make them feel the process was successful?
**In the case of the production handoff process: **
- Customer: Internal production department
- Their expectation: A fully approved, build-ready order without missing details.
Output – What should the process produce?
Now define the end result.
- What does a successful process outcome look like?
- What specific quality, completeness, or timeframe must be met?
- How is the output delivered to the customer?
In the case of the production handoff process:
Output: A production-ready work order that includes:
- Final customer specifications
- Approved design or drawing
- Confirmed bill of materials (BOM)
- Scheduled production start date
Process – What are the key steps to get there?
With the output in mind, outline the essential steps needed to achieve it.
- What initiates the process?
- What are the major activities from start to finish?
- What decisions or checkpoints are required?
Aim for a clear, logical flow of 4-7 high-level steps. Don’t worry about exceptions yet, just focus on the ideal, repeatable path.
In the case of the production handoff process, the steps are as follows:
- Validate order requirements
- Finalize design/drawing with customer
- Approve BOM and sourcing feasibility
- Set production slot (based on capacity)
- Release the internal work order
Input – What’s needed to begin?
Work backward from the process steps.
- What must be available and correct before work can begin?
- Are there forms, documents, tools, or systems involved?
- What are the common causes of delays or errors at the start?
In the case of the production handoff process, the inputs are:
- Signed customer order
- Initial design specs or customization notes
- Preliminary BOM from sales or engineering
- Target delivery date
Supplier – Who provides the inputs?
Finally, define where the inputs come from.
- Which teams, people, or systems are responsible for supplying them?
- Are they consistent and reliable? If not, how can the process be designed to accommodate or improve that?
In the case of the production handoff process, the suppliers are mostly the Sales team (responsible for signed order and customer notes). Involved stakeholders are the Engineering team (design support) and the Planning team (BOM feasibility).
What’s more besides SIPOC?
As you design the structure of your process using SIPOC, there's one more decision that brings clarity and accountability: who owns the process, and who carries it out? While you don’t need to name specific individuals, you should define the functions or teams responsible for each step.
Assign a Process Owner
Every process should have a role that is accountable for:
- Overseeing the process from end to end
- Making sure it delivers the intended output
- Initiating improvements over time
This owner is not necessarily doing the work, but they’re responsible for the process working well. They handle escalations, review performance, and coordinate updates when things change.
Example: In the case of the Production Handoff process, the Operations or the Planning Manager might be the owner of the process, ensuring timely handoff to production with all approvals.
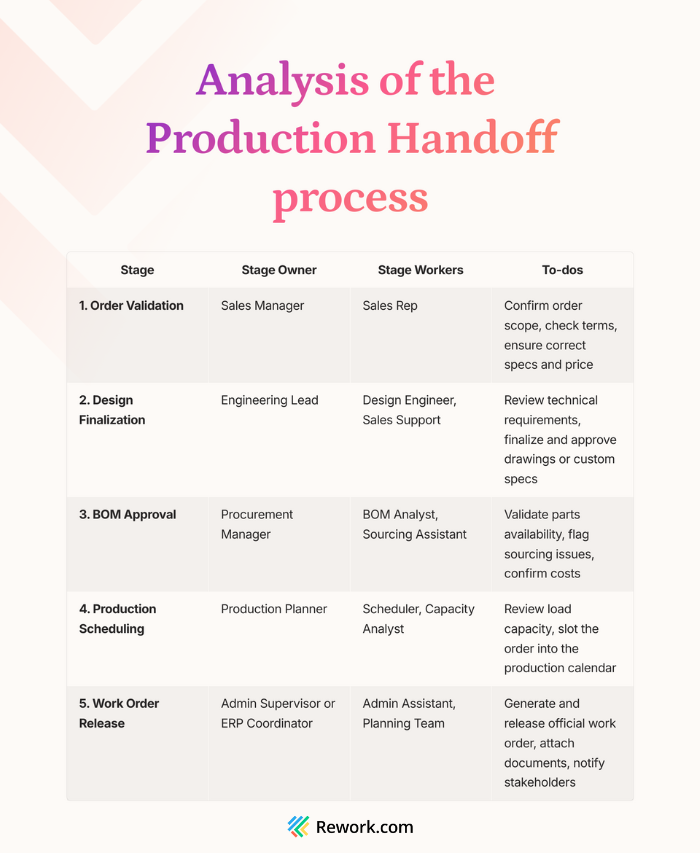
Identify the Stage Owner and Stage Workers
Similarly to the Process Owner, a Stage Owner is someone responsible for overseeing, but this time within a certain stage. Working closely with them are the Stage Workers, who are the main executors.
Think in terms of:
- Who supplies the inputs?
- Who completes each step?
- Who approves or reviews?
- Who receives the output?
Example:
Tips for running a process design session
Process design isn’t a solo job. In the end, processes are all about collaboration and coordination across teams and departments; that’s why you can only design a good process when you bring the right people together for a productive design session.
Here’s how you do it:
Bring the right people into the room
Invite a cross-functional group that includes the process owners, the stage owners, and the stage workers. And if possible, other team members who rely on or affect the process Be mindful of hierarchy: if someone’s presence makes others hesitant to speak up, consider excluding them to foster openness. The goal is a safe, candid environment where people feel free to say, “In practice, we actually do it like this…”
Define a clear objective
Before the session begins, align the group on why you're designing the process. Are you:
- Mapping the current process to find improvement opportunities?
- Documenting it for training purposes?
- Understanding a particular problem (like why errors have increased)?
Stating the goal upfront helps the team stick to the relevant details. For instance, if the goal is to improve turnaround time, you’ll want to pay special attention to delays and wait times during mapping.
Do the gemba walk
In Lean practice, “the gemba walk” means go to the actual place where work is done – see it with your own eyes. Before or during your mapping session, try to observe the process in action on the ground – at the shop floor, in the system, or via a screen share. If that’s not feasible, have someone describe a recent case step by step.
Often, you will discover there’s a difference between the documented procedure and what actually occurs day-to-day.
Use simple tools everyone can engage with
Whether physical or virtual, stick to tools that encourage participation. A big sheet of paper, sticky notes, or a shared whiteboard tool works best. Let people call out steps in any order – you can always rearrange as needed. Focus on capturing what’s true, not what looks clean. A messy, honest map is better than a tidy fiction.
Ask questions, don’t give answers
A question-based approach helps surface the truth without putting pressure on anyone. As a facilitator, you should guide with curiosity:
- “What happens after this step?”
- “Where do we get that information?”
- “Who is responsible here?”
- “What causes delays or rework?”
If two people disagree on how a step is done, note both versions or mark it as something to clarify, rather than shutting one down. That uncertainty is a clue: your process isn’t standardized yet.
Mark pain points and observations
As the map comes together, pay attention to the points where people say things like “sometimes this fails…”, “we often have to wait for…”, or “if X happens, then we….” These are clues to where the process could be improved. Mark these on the map with a different color sticky or a symbol (like a lightning bolt for problems or a cloud for delays). Also note any metrics mentioned (e.g., “this step usually takes 2 days” or “we get about 5 complaints a week at this point”).
Encourage the team to discuss why certain pain points occur. Often, the people doing the job have ideas about what causes the bottleneck or error, and even ideas for fixes.
End with agreement and next steps
Once you’ve mapped the current state to everyone’s satisfaction (it doesn’t have to be perfect, just representative), take a step back and review it as a group. You might ask, “If you had to explain how this process works to someone else, does this map do it clearly?” or “Does everyone agree this is essentially how things flow today?”.
Running a design session this way does more than clarify a process; it builds ownership and engagement. When people help diagnose the problem, they’re more likely to embrace the solution. And that’s how you turn a sketch into a better way of working.
What happens after design?
Design is not the end. Once your process is well-defined, it needs to be communicated and modeled. Let’s save that for our next article, where you will learn about flowcharts and swimlanes to turn your structured ideas into visual references the whole team can use.

Principal Product Marketing Strategist
On this page
- The Design stage: What is it for?
- Signs your process needs redesigning
- How to identify which processes to design
- Start with the value stream
- Decompose into smaller processes
- Prioritize with the Impact-Effort Matrix
- Steps to design a process - SIPOC framework
- Customer – Who is the process for?
- Output – What should the process produce?
- Process – What are the key steps to get there?
- Input – What’s needed to begin?
- Supplier – Who provides the inputs?
- What’s more besides SIPOC?
- Tips for running a process design session
- What happens after design?