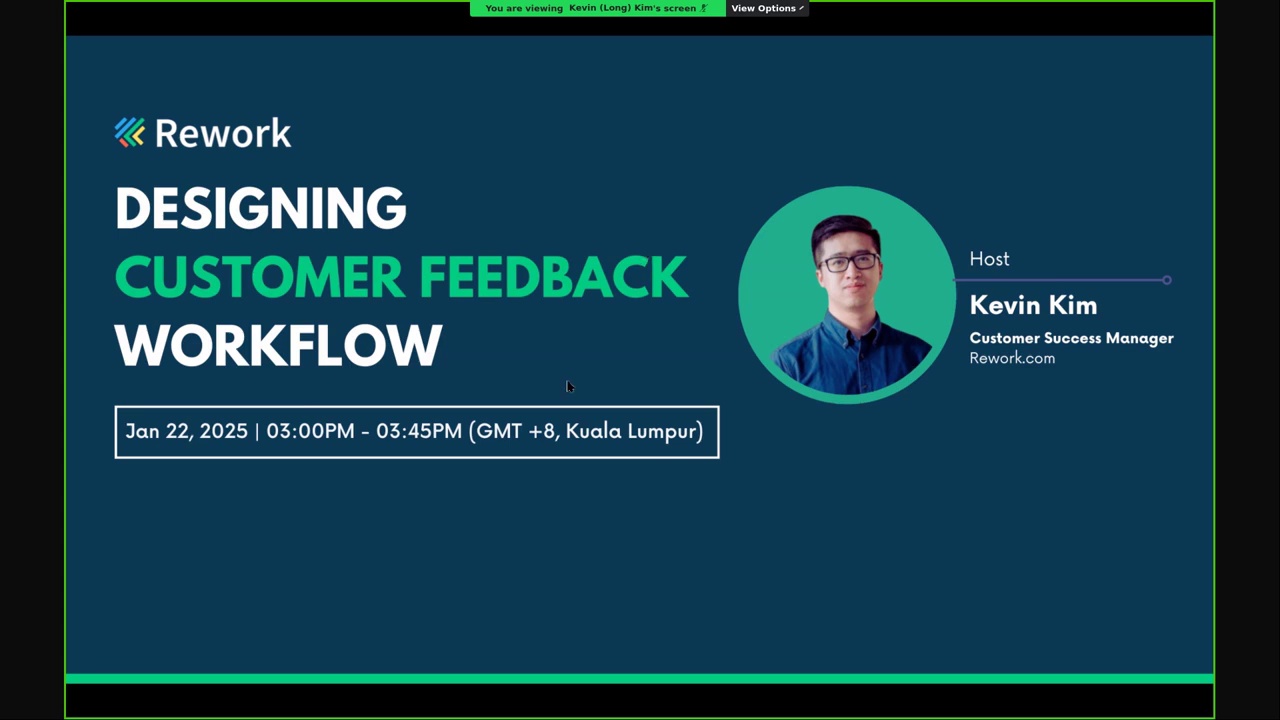
Designing Customer Feedback Workflow
Video Version: Watch on YouTube
In this comprehensive webinar, Kevin presents a detailed guide on designing and implementing an efficient customer feedback workflow using the Rework platform. The importance of valuing customer feedback as it signifies customer care and engagement. Customer feedback often arrives through diverse channels such as email, phone calls, chat, or social media, which complicates centralized collection, analysis, and follow-up. We proposes a streamlined workflow solution that consolidates feedback into a single hub, categorizes it, prioritizes and analyzes root causes, takes action, and closes the feedback loop by following up with customers.
The session features a live demonstration where attendees participate by submitting feedback via a web form designed on the Rework platform. Kevin walks through a step-by-step workflow visualization: from ticket creation and automated assignment to team members, analyzing and proposing solutions, approval, action, follow-up duration, and ticket completion. The platform facilitates task assignment, progress tracking, prioritization (using tags), collaboration, and communication, ensuring accountability and clarity within the team.
Highlights
- Global audience participation from multiple countries.
- Step-by-step workflow design for centralized feedback management.
- Interactive live demo with real-time feedback submission.
- Automated ticket assignment, prioritization, and progress tracking.
- Configurable email notifications enhance customer communication.
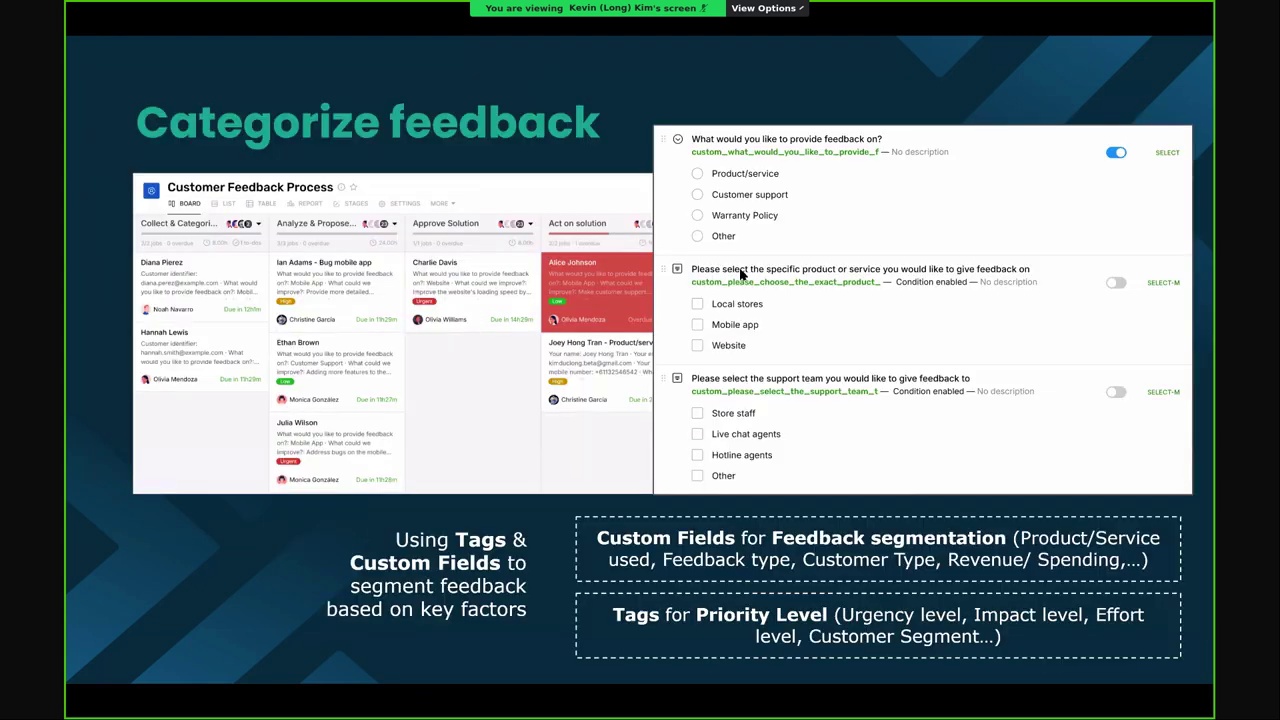
- Use of tags and custom fields for effective feedback segmentation.
- Easy-to-use templates and web form embedding for quick deployment.
Slide Version: See below

I'm Kevin, and I'm really glad to have all of you here today. Welcome everyone to our webinar. Today I will share about the topic: customer feedback workflow and how we can design and build it on the Rework platform.
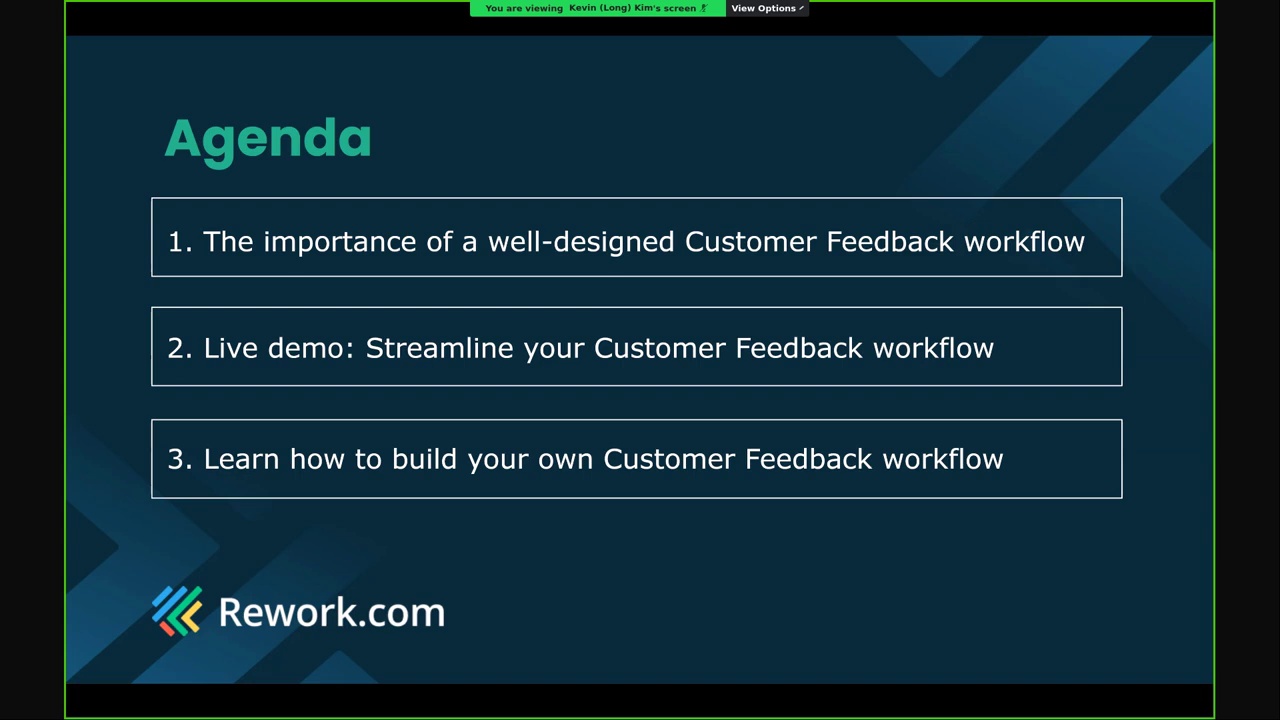
We'll go through three main parts: first, the importance of a well-designed customer feedback workflow. Then, a live demo to show how to streamline it on the system. Finally, how to build your own workflow.
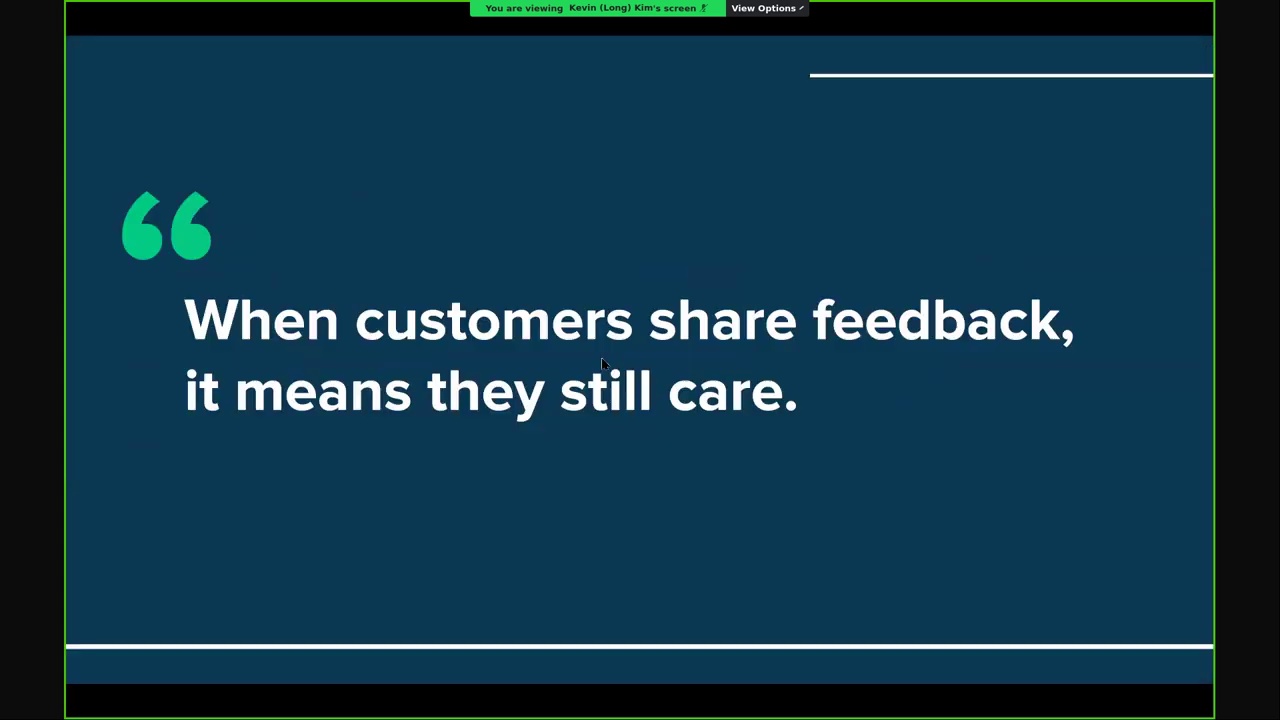
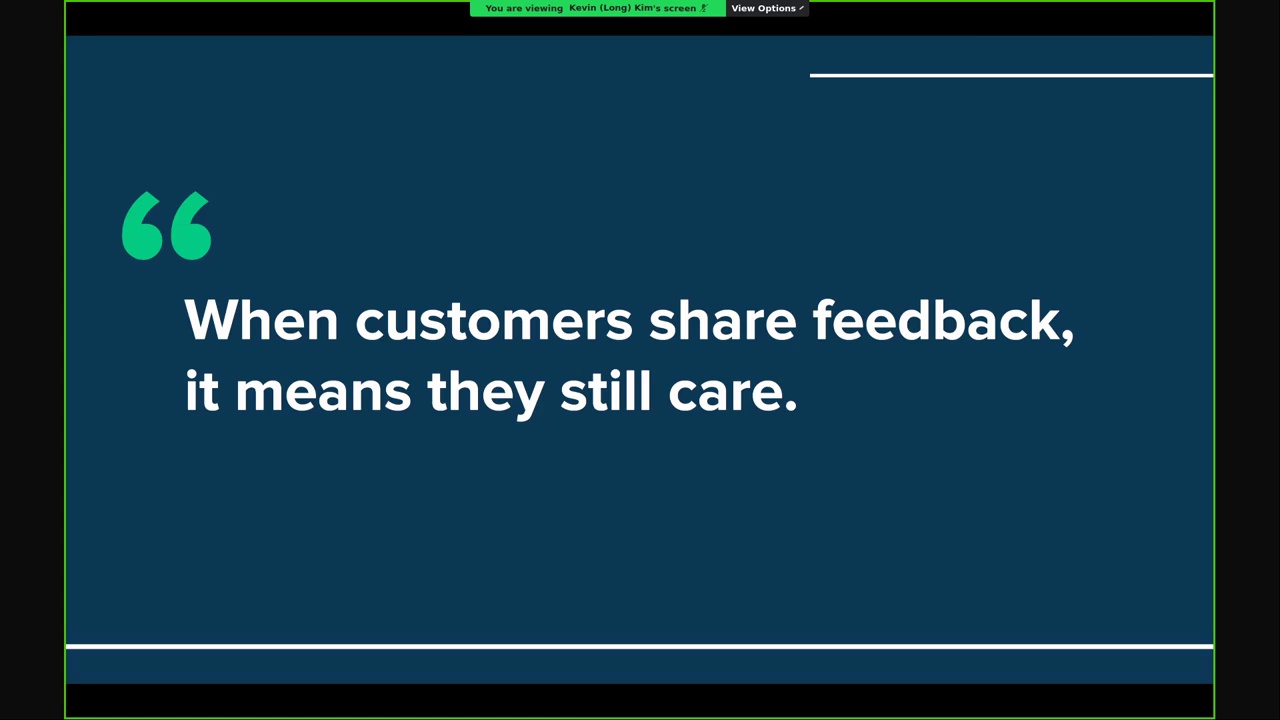
At Rework, we believe that when a customer shares feedback, it means they still care. To improve our product or service, we should value every piece of feedback and make customers feel heard.
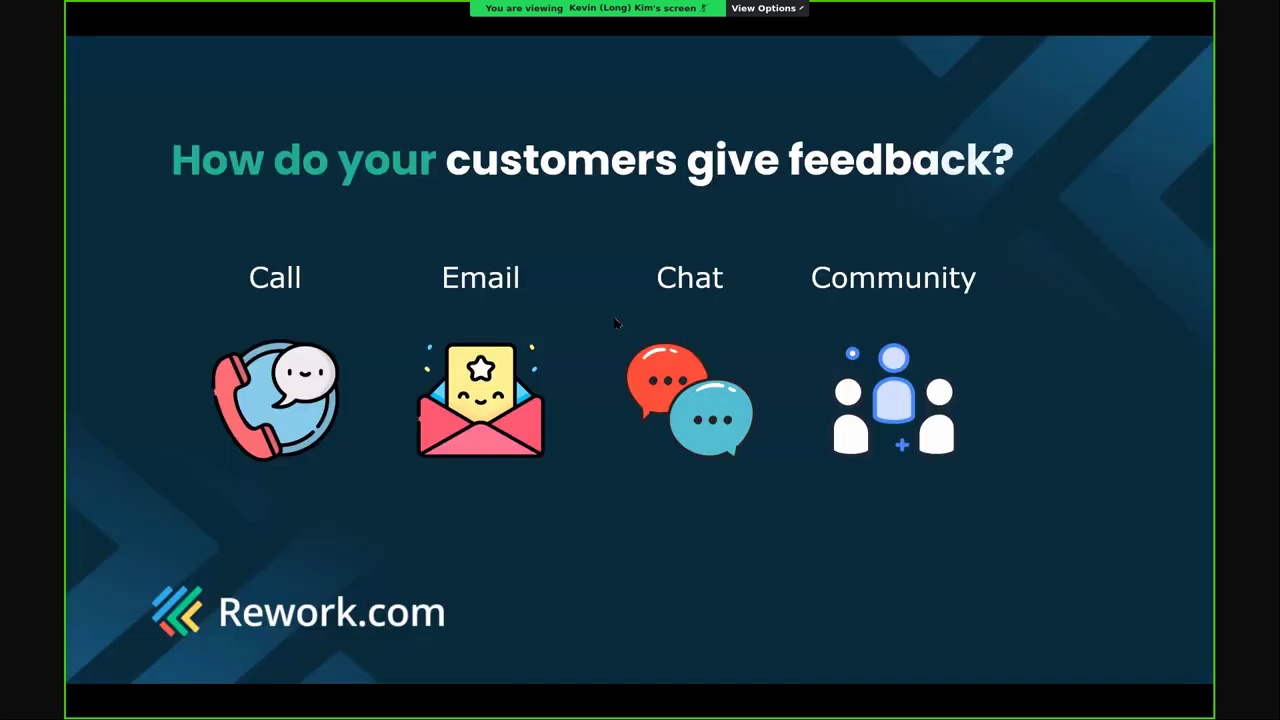
How do companies currently handle customer feedback? Most often through calls, emails, chat, or community platforms. Usually, it's someone from the company who receives and handles these inputs.
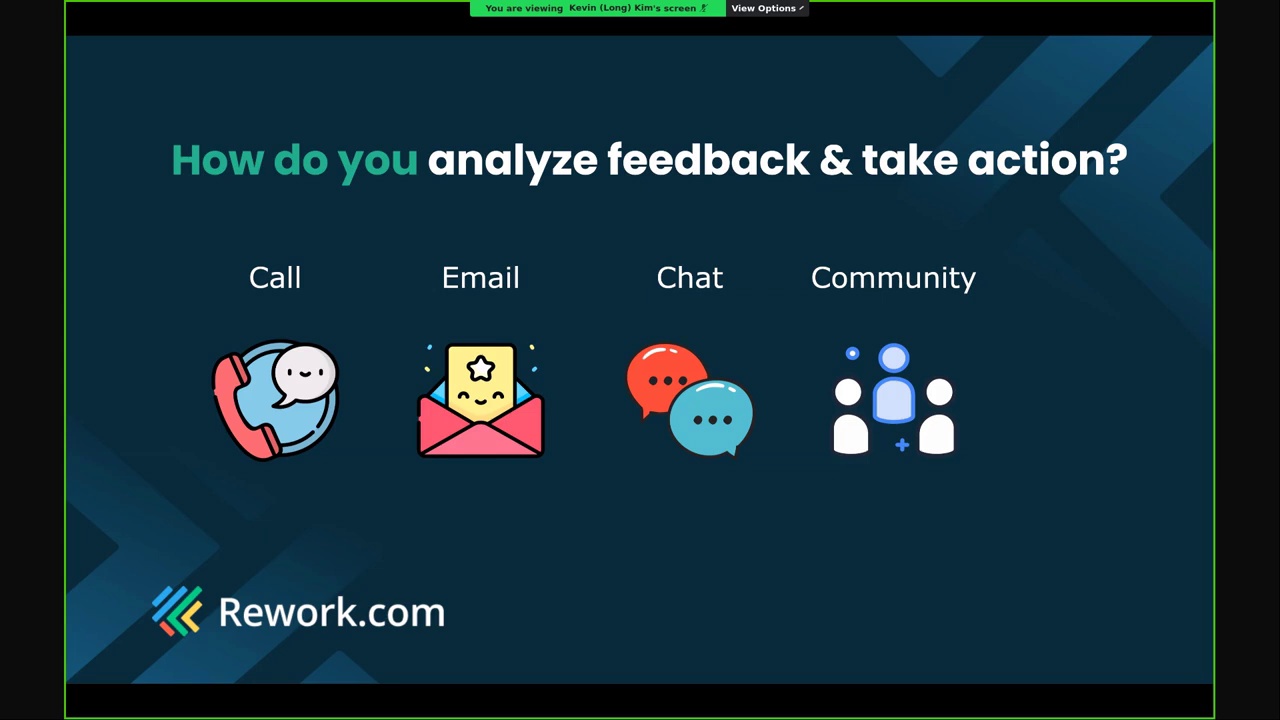
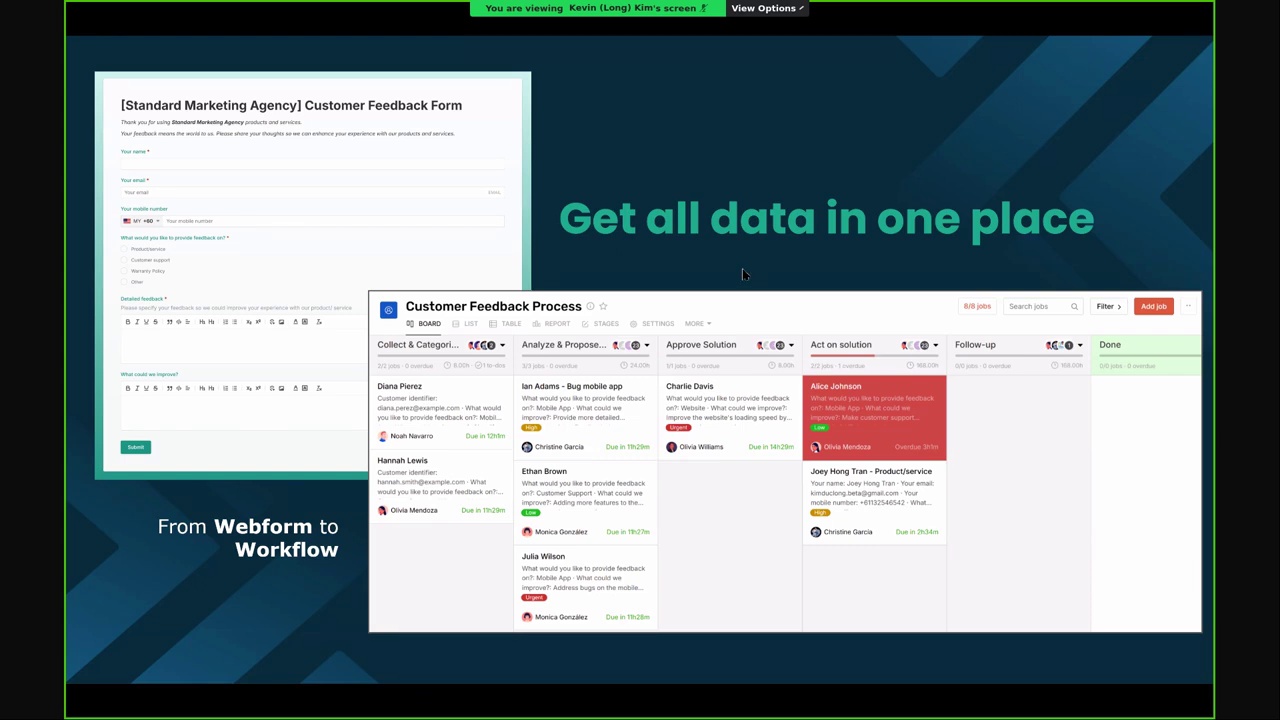
The challenge is that feedback is scattered across channels. Many companies dont have a centralized place to collect, analyze, and act on it. So today, we propose a way to redesign this workflow.
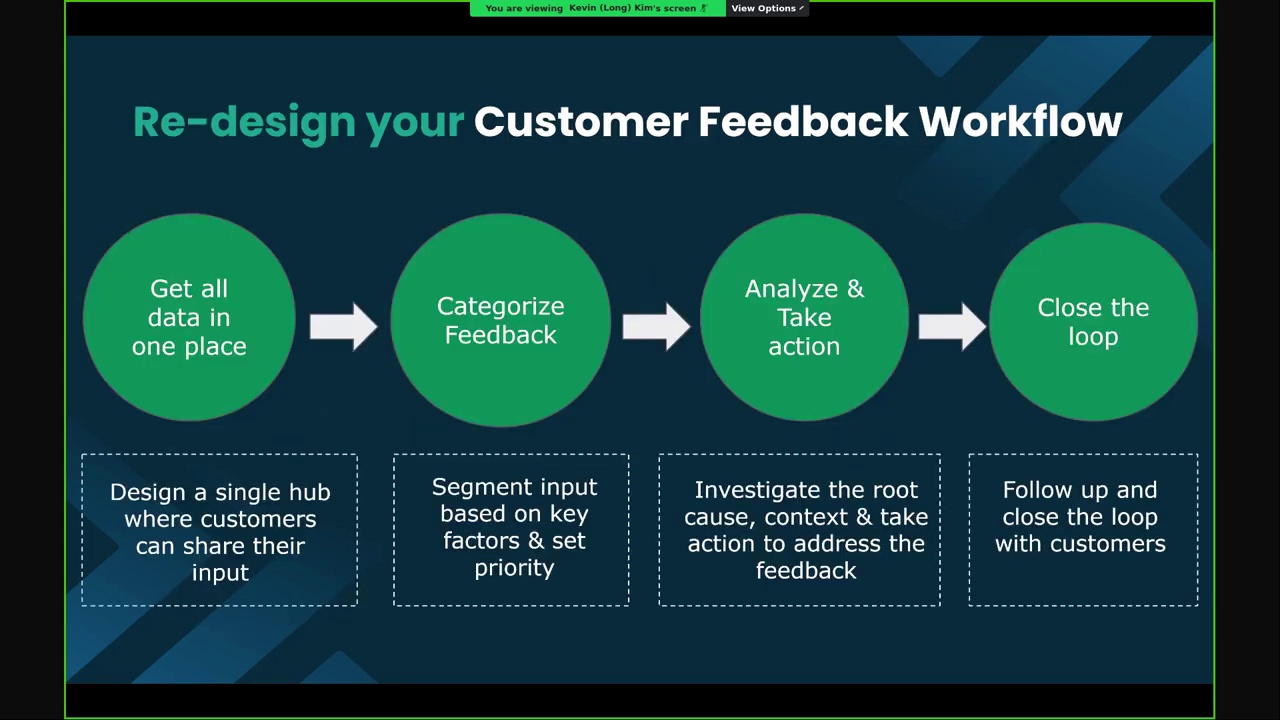
The approach: gather all data into one place, categorize the feedback, analyze it, take action, and close the loop. Start by designing a hub where customers can share their input.
Next, set priorities, segment feedback, investigate root causes, and take action. Finally, follow up and close the loop with the customer.
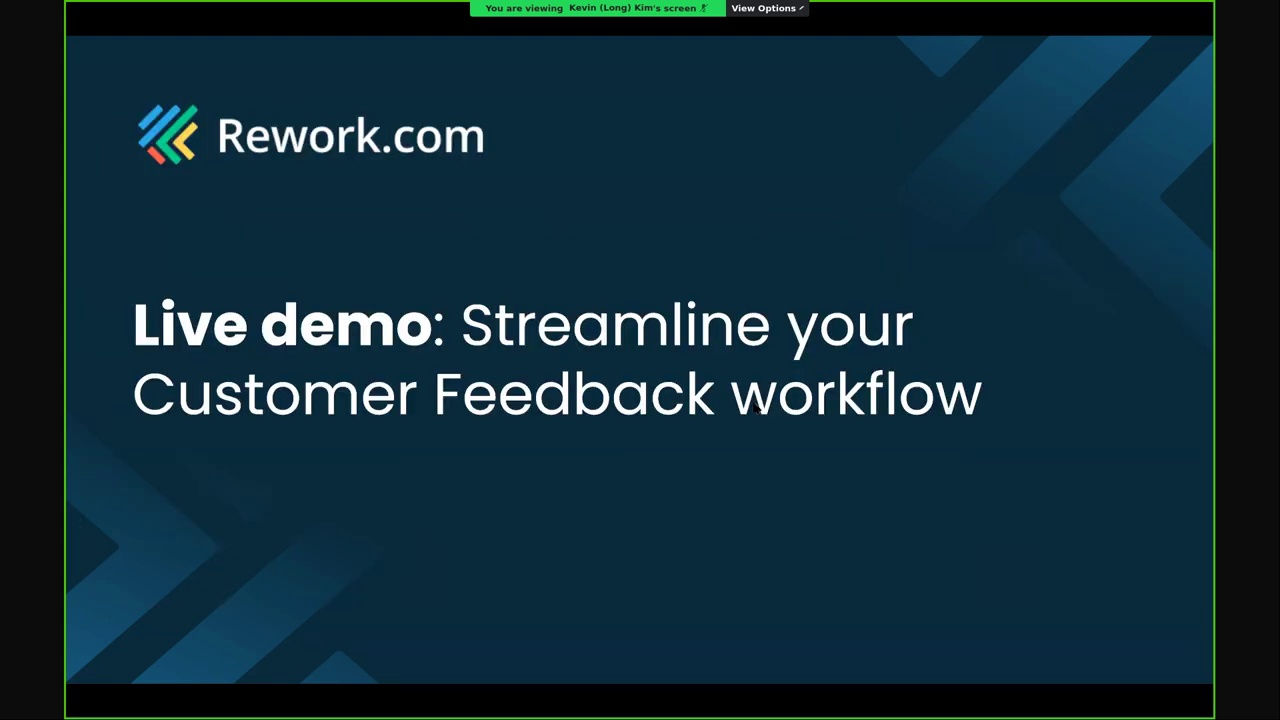
Lets move to the demo. We'll begin with a quick activity.
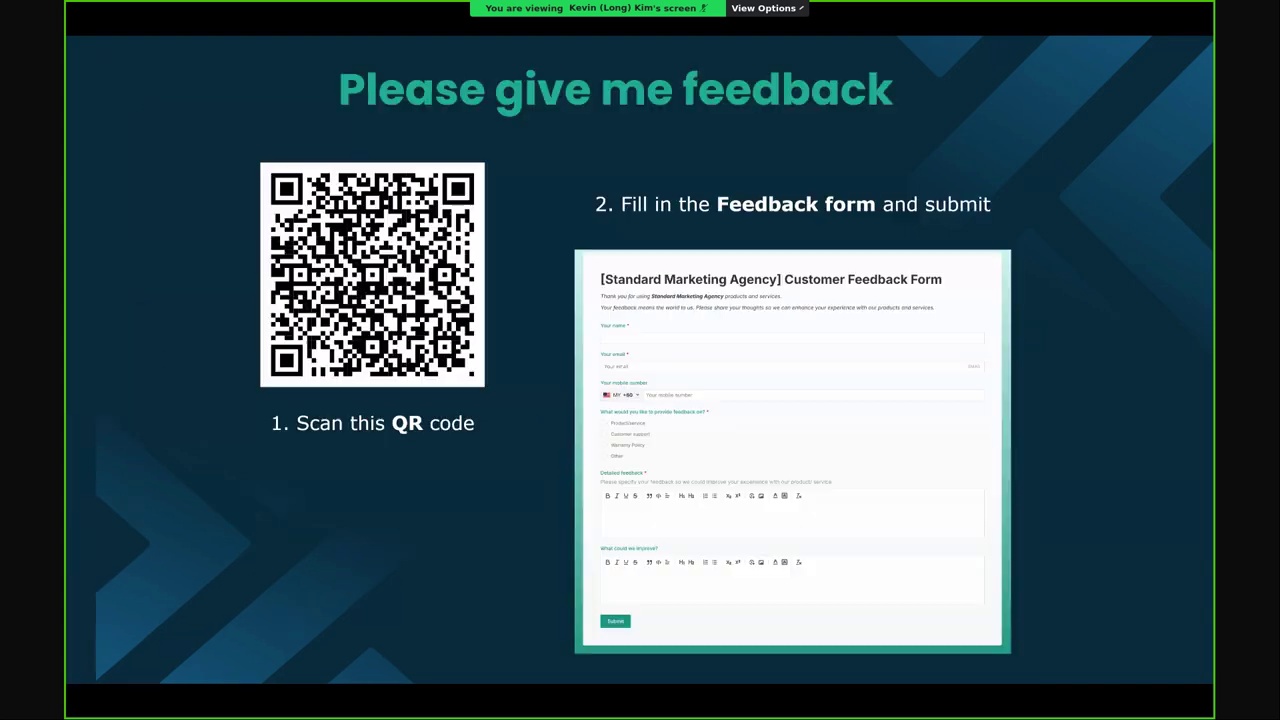
Scan the QR code on screen
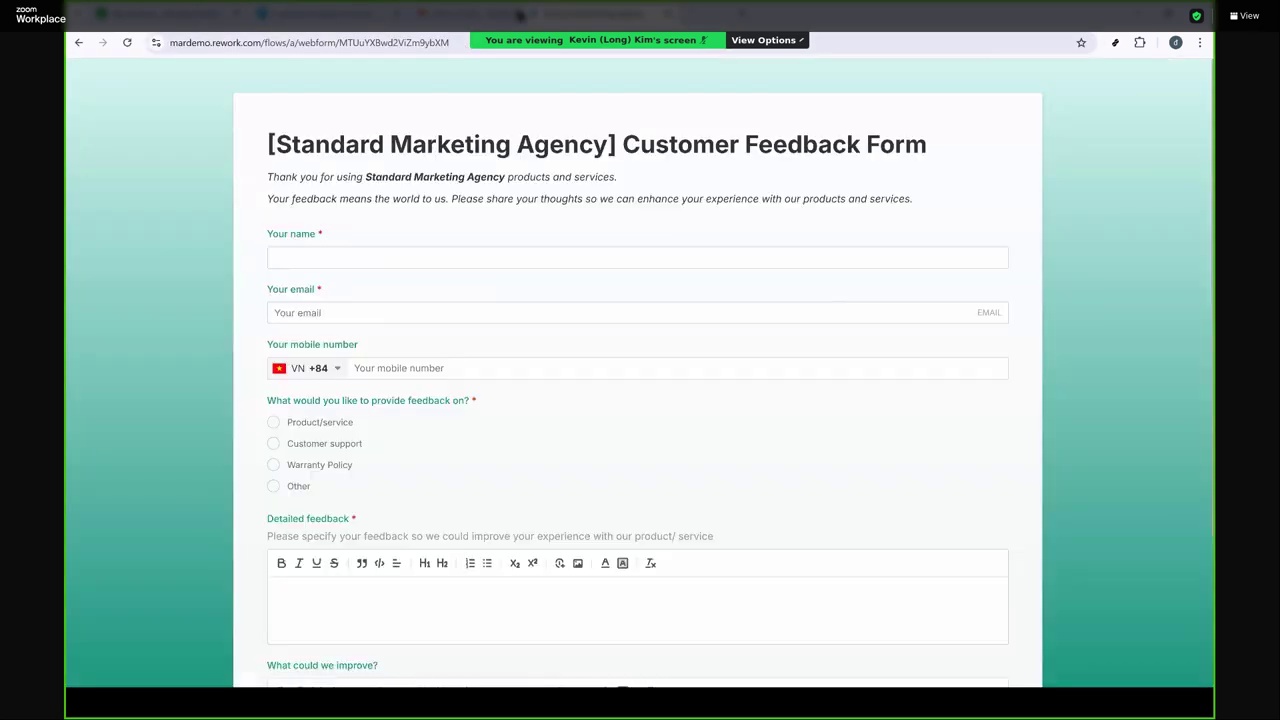
to access the feedback form on your phone and submit it.
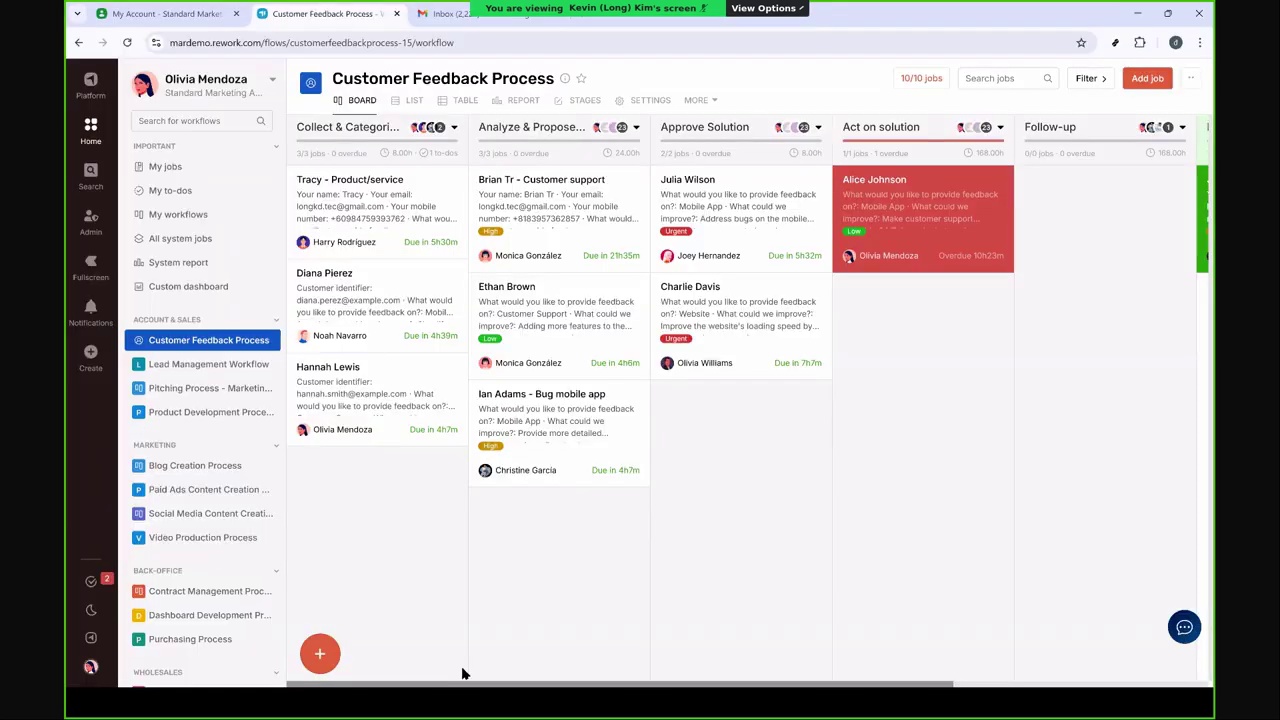
Once the form is submitted, you should see this interface.
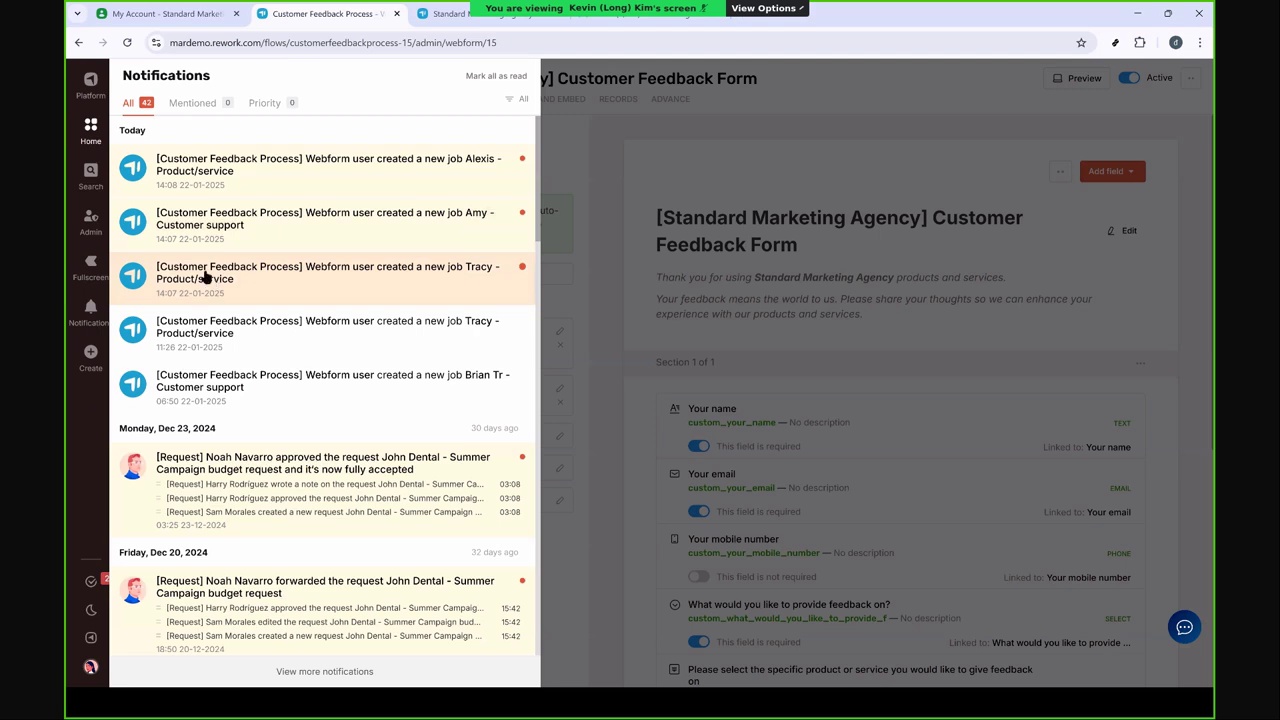
Here, I'm using an account called Olivia, and we just received a few notifications for new feedback jobs like Amy and Alexis.
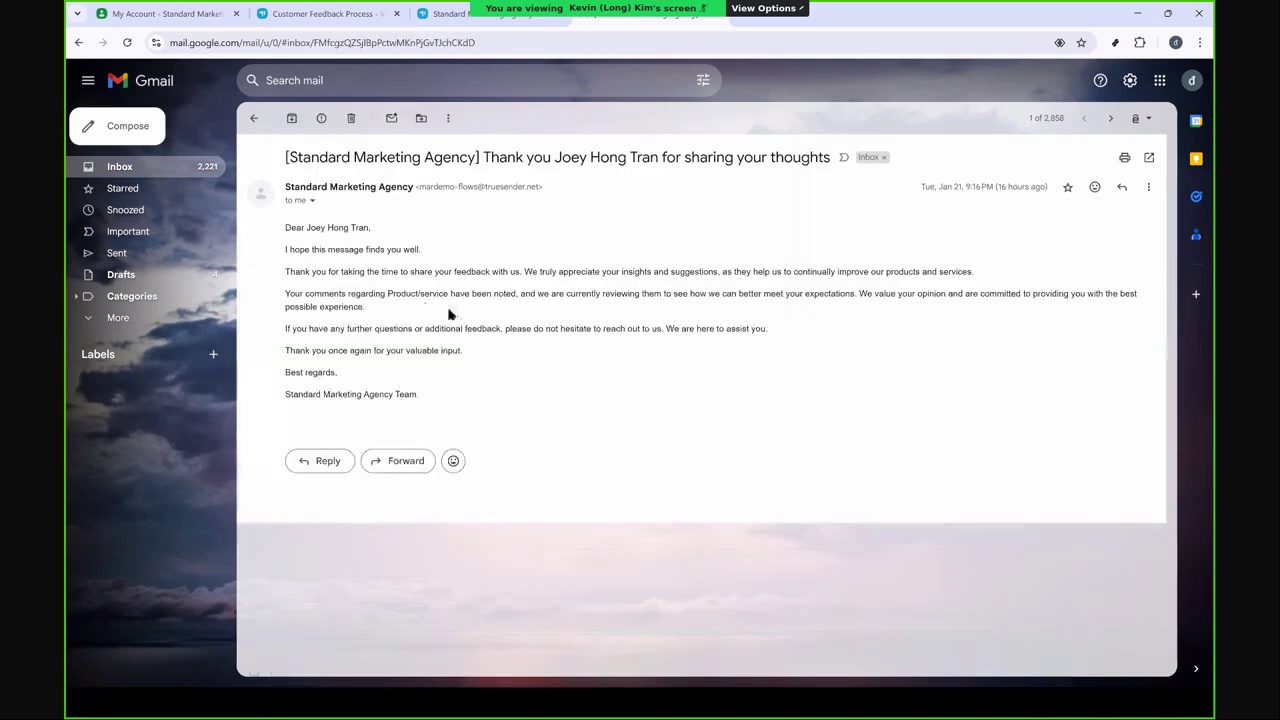
Assuming I'm the head of the support team, I publish the form to customers. When new feedback comes in, I get notified. The submitter also receives an email confirmation that we've received their ticket.
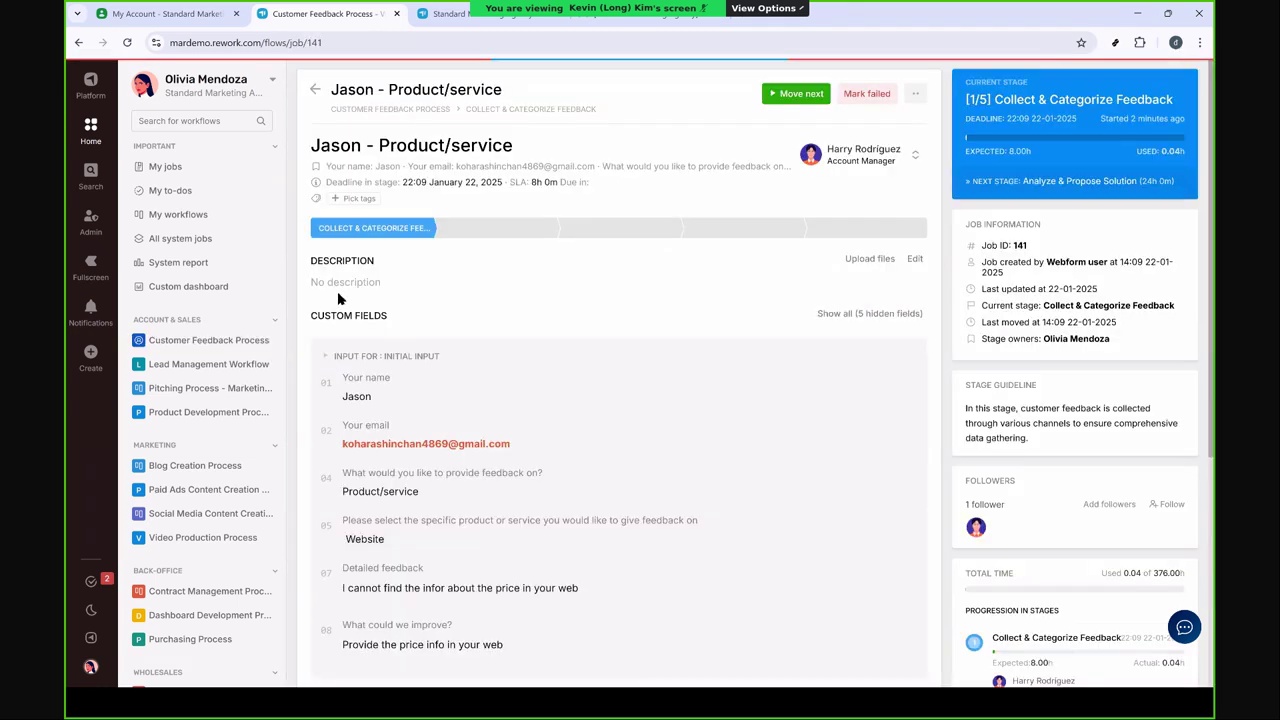
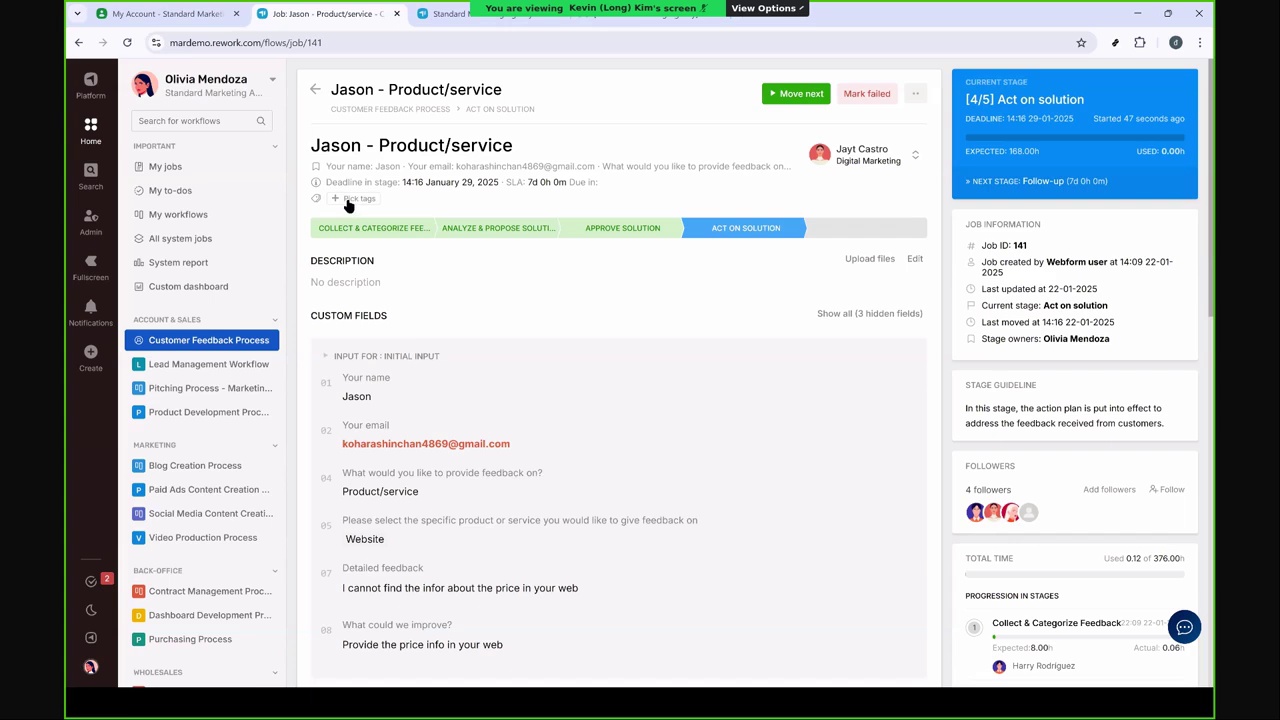
Let's say I'm Harry, the account manager. I received a ticket about a website issue. I need to determine the feedback source, type, and assign the task to the right person.
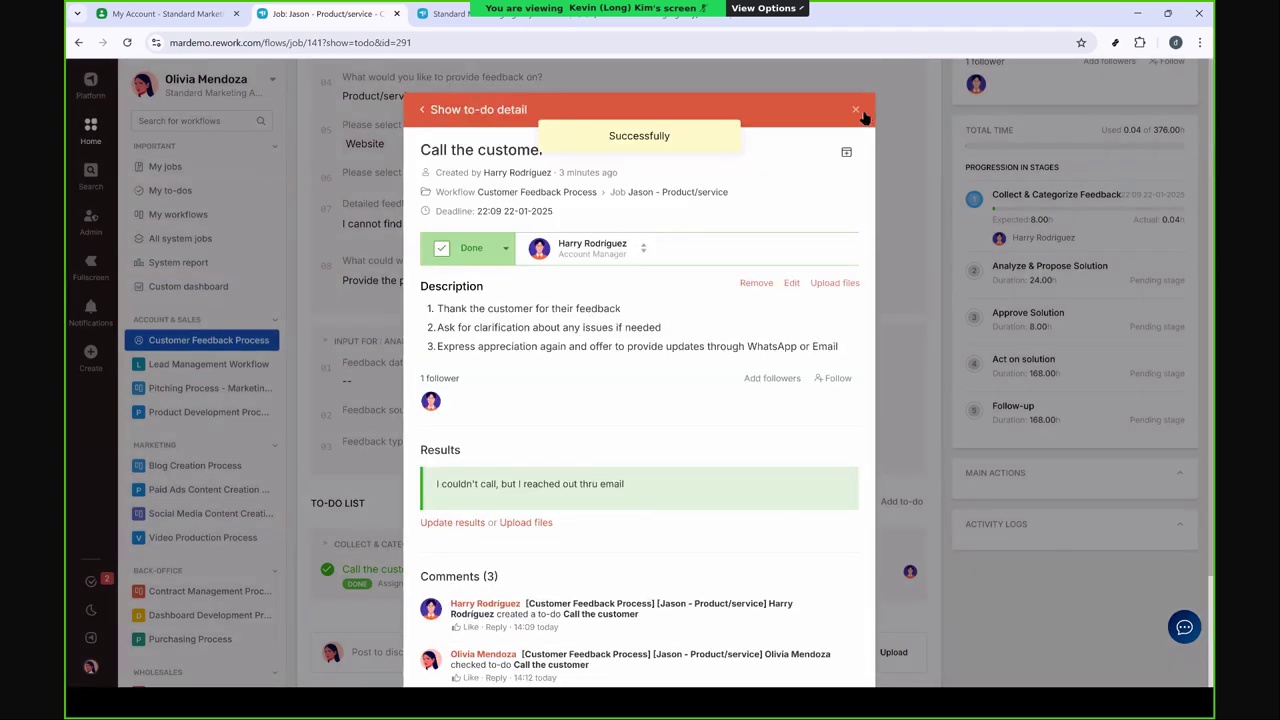
Every ticket gets a to-do. For example, Harry needs to call the customer. If no phone number is available, he follows up by email and marks the task done.
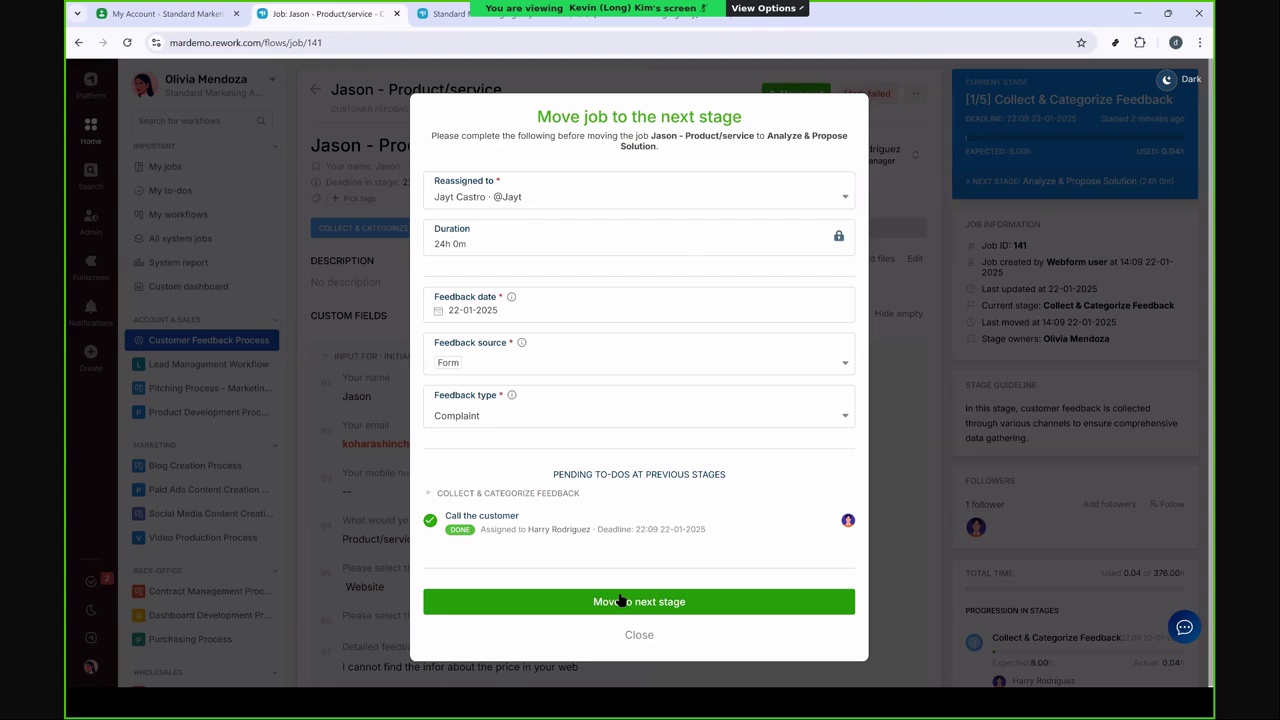
Next, the feedback is categorized like complaintand reassigned to the next handler, for example, Jay T, who will analyze and propose a solution.
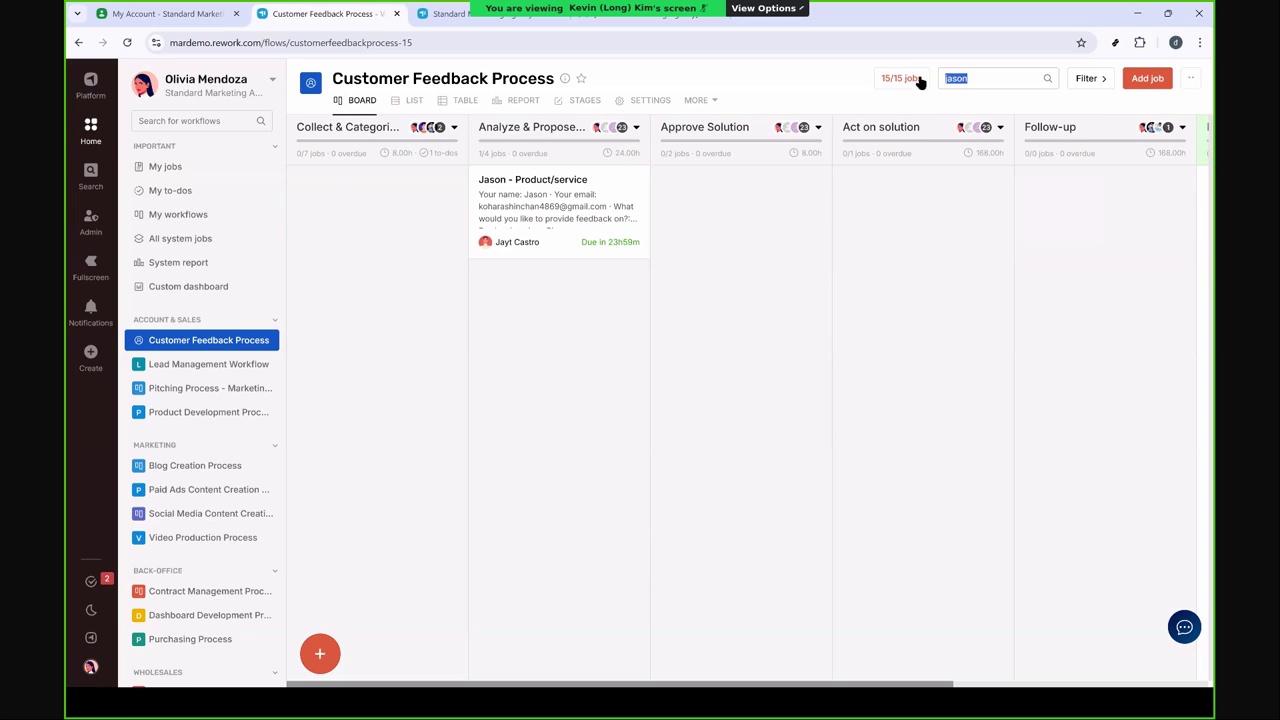
From the board view, managers can search and track the status of each ticket by customer name or email. It's easy to follow the progress.

JayT proposes a solution for example, "add pricing info to the website".
If the solution requires approval or budget, its will be updated. Otherwise, it's reassigned to someone to act on.
I will move so in the next stage.
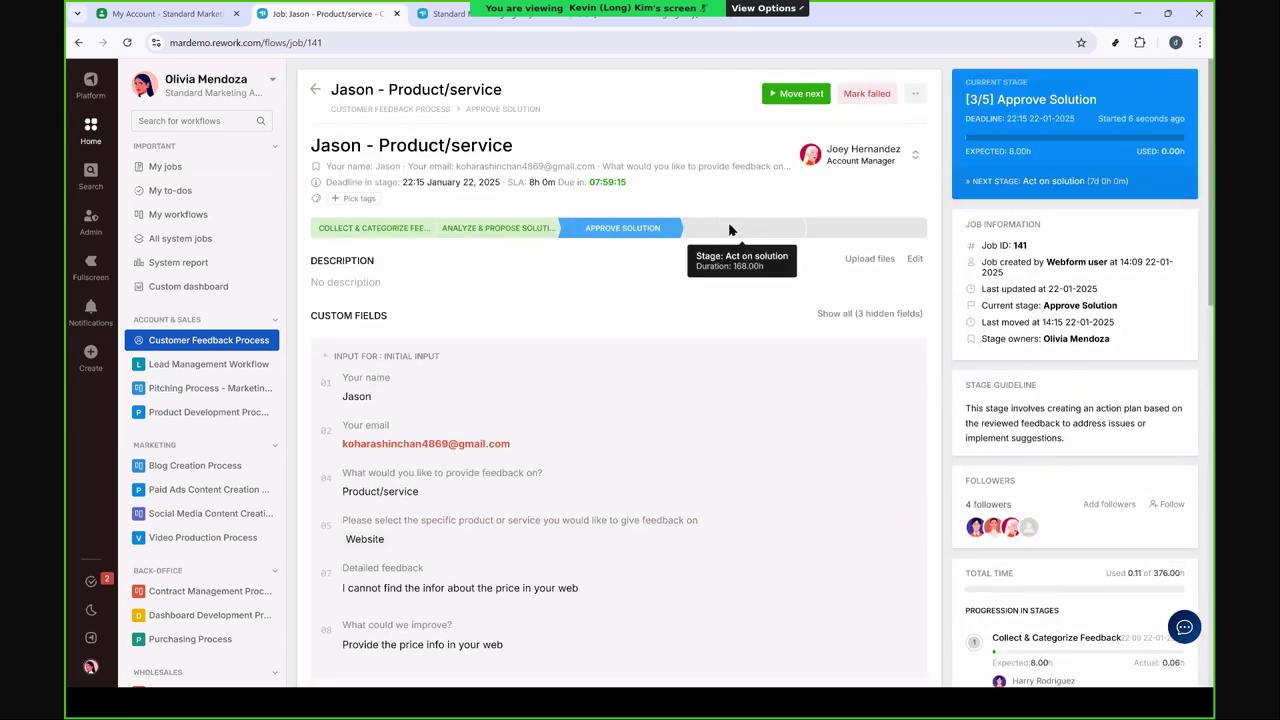
Joey, the account manager, confirms the solution with the team, adds any collaborators,..

.., and approves the next step.
The system automatically reassigns the task to the next handler,
for example JayT again.
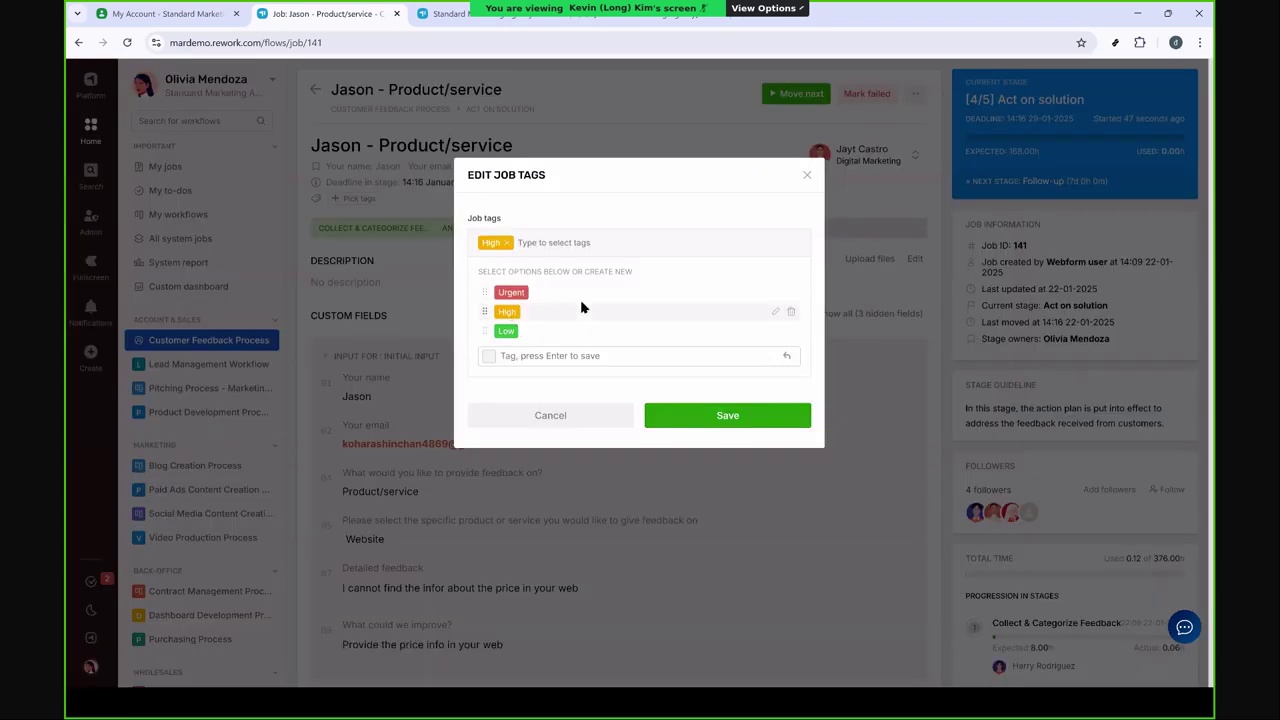
JayT adds tags like High Priority and will completes the solution.

Once done, JayT moves the task to the follow-up stage.
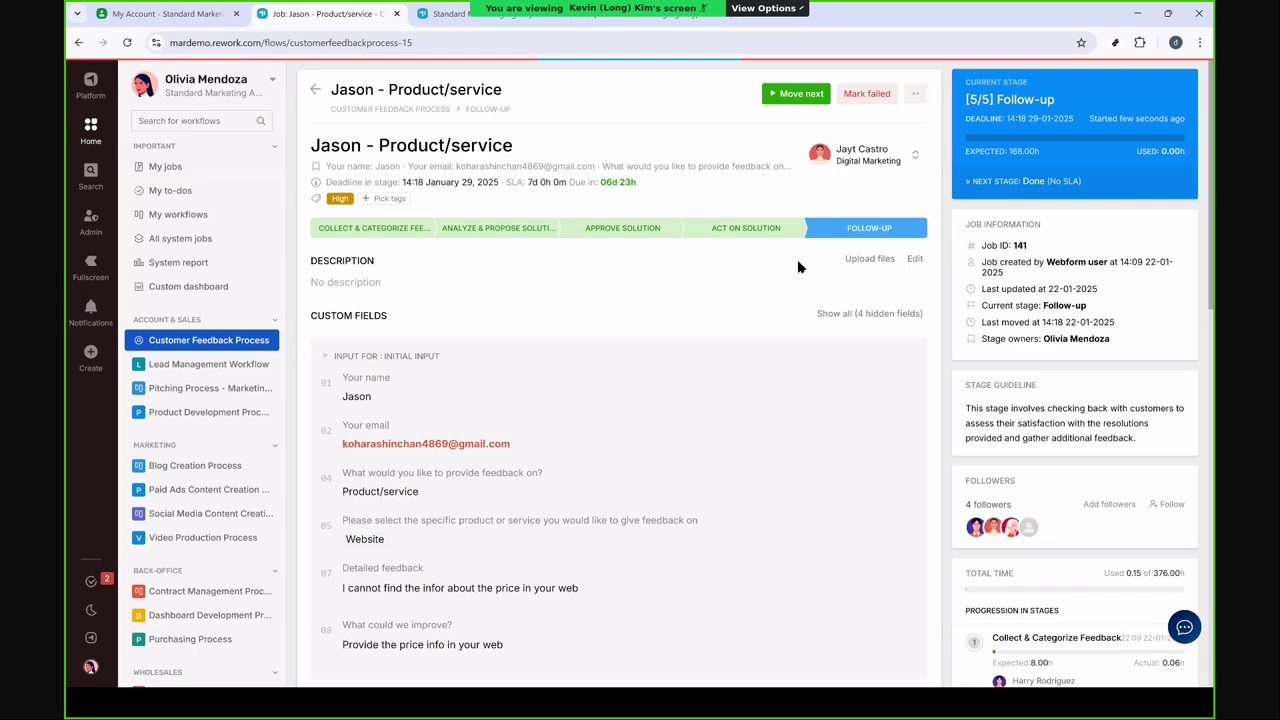
The card remains in this stage for about a week, during which the team checks for recurring issues.
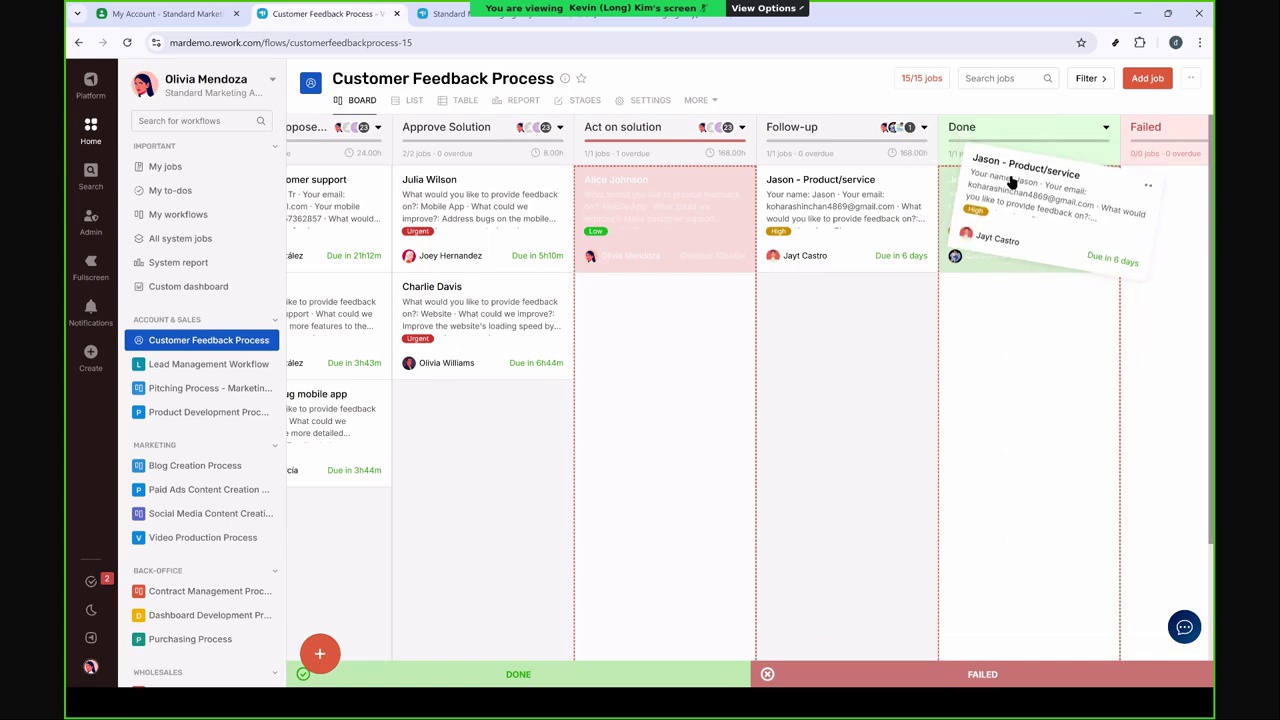
After confirming the issue is resolved, the ticket is marked as Done with a summary
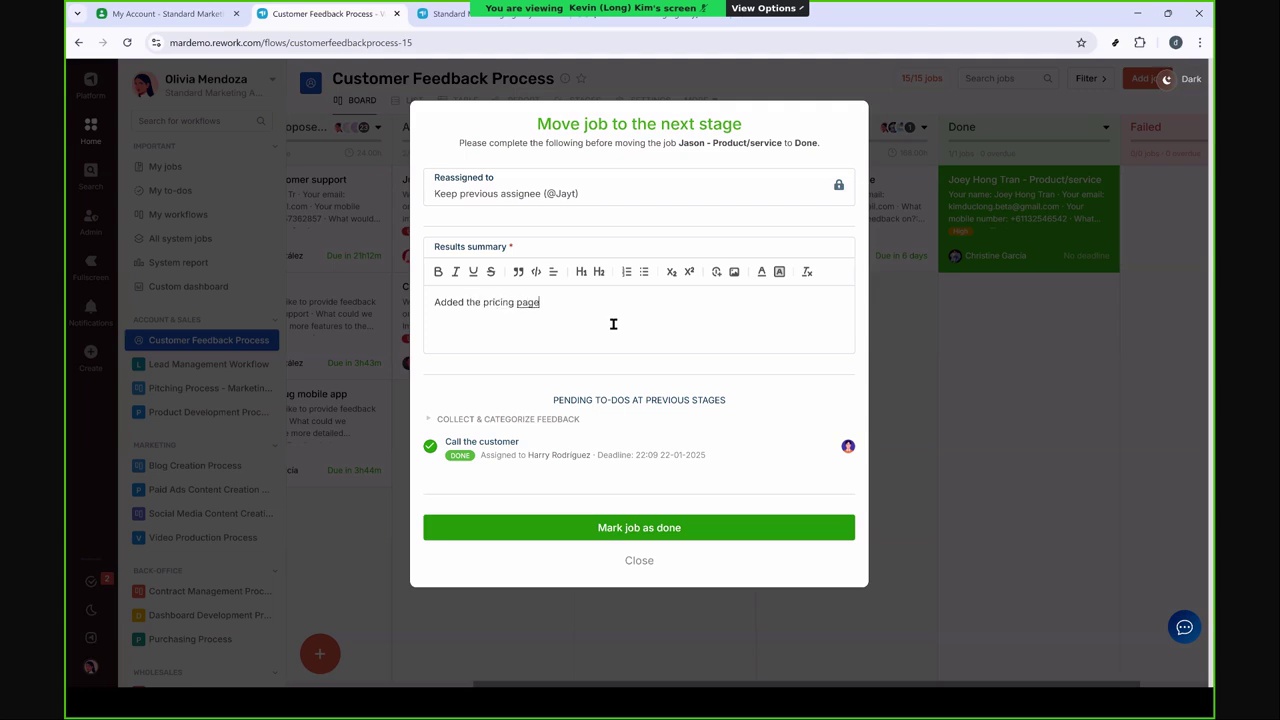
and relevant links or notes.
This shows how a webform connects to a workflow where every stage, person in charge,
and custom field is predefined and structured.
With custom fields and tags, you can segment feedback like by product, service, customer type, or priority.
Tailor it to your internal operation.
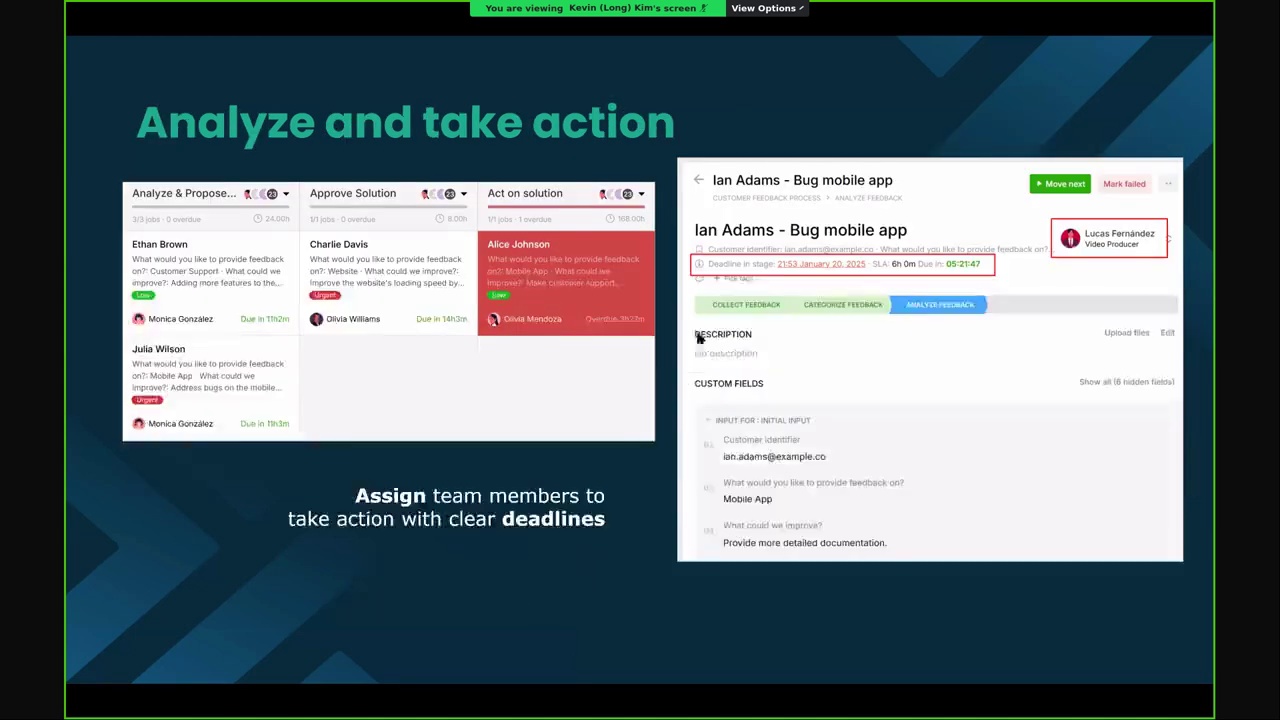
Team members are assigned actions with deadlines.
You can monitor all ticket statuses from the board view.
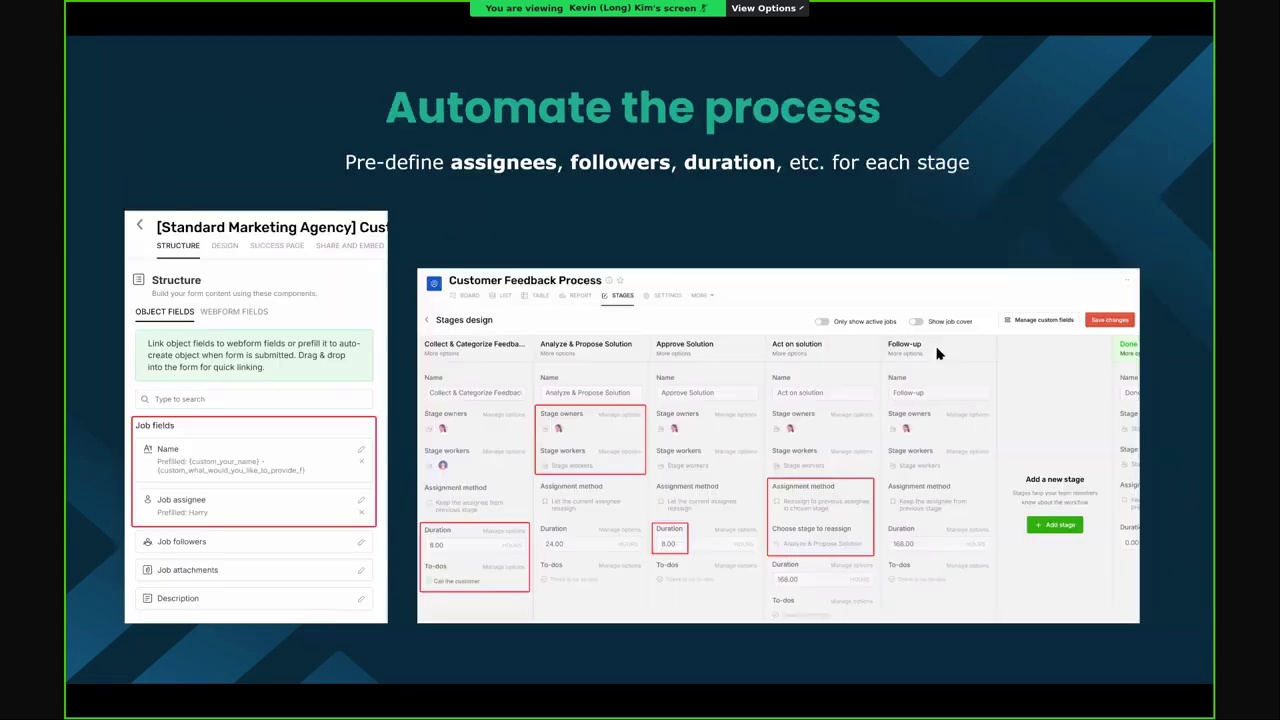
The process is automated. From assigning the first card to Harry, to setting up stage durations and to-dos like Call customerit all follows a system.
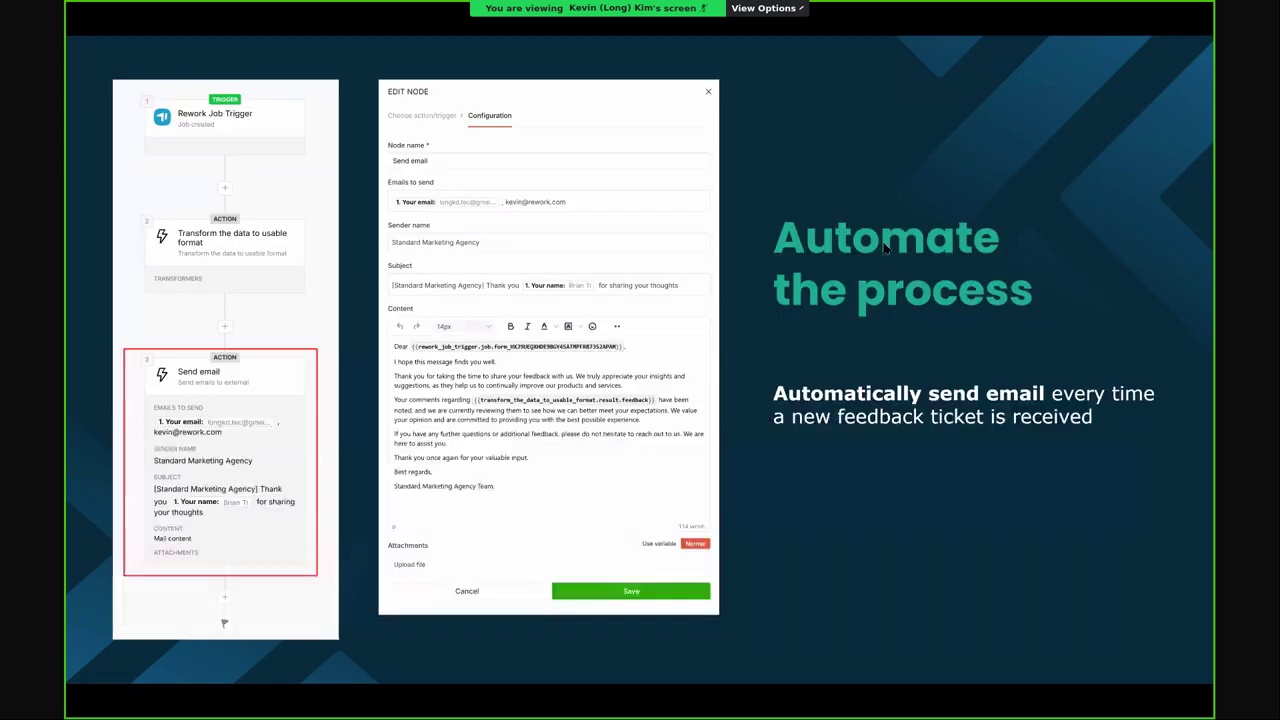
You can configure email notifications triggered by job creation, including custom content for confirmation emails.

To build your workflow:

Let’s walk through how to build your own customer feedback workflow.
Step 1: Design Workflow Stages Define each stage of your workflow, who’s responsible, how assignments are made, stage durations, and required to-dos.
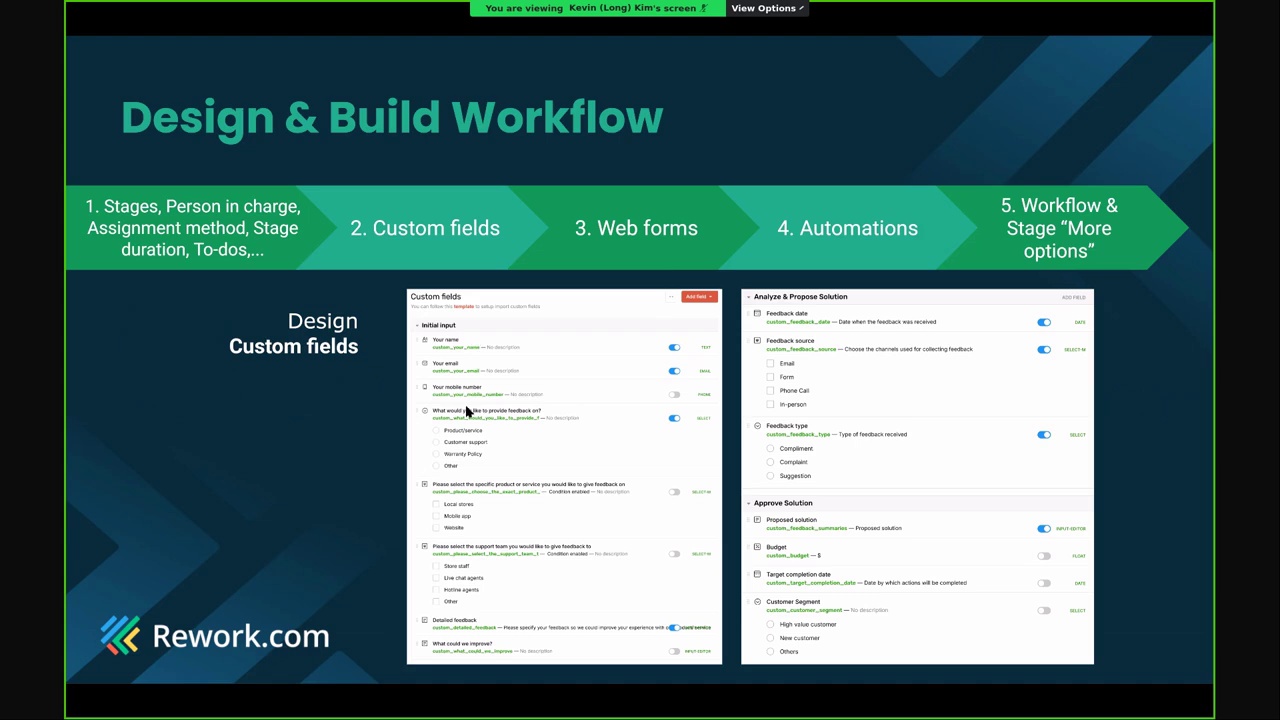
Step 2: Set Up Custom Fields
Custom fields store information from the form. For example, the customer’s name, email, product category, or feedback type.
You need to link fields to specific stages to capture and track data properly.
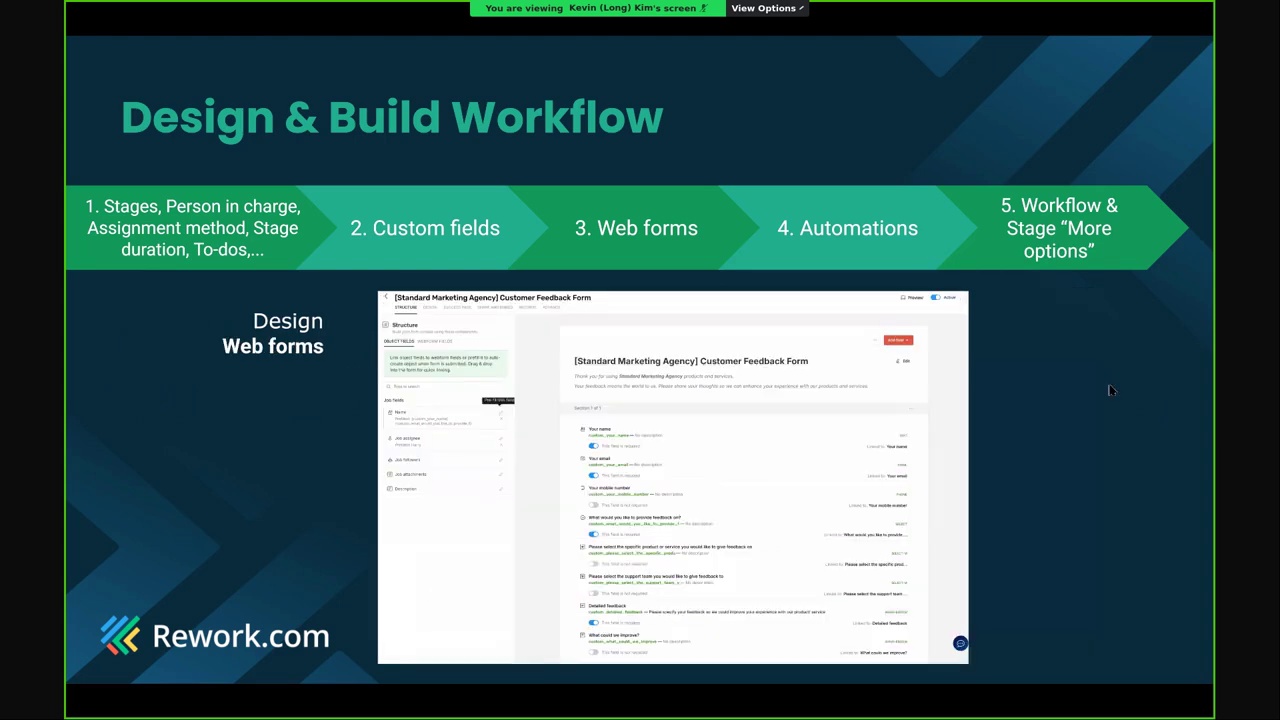
Step 3: Design the Web Form
Use a drag-and-drop builder to add custom fields into your form. Customize form design-colors, background, success message, and descriptions.
After submission, the form will show a confirmation message (e.g., “Thank you. We’ll get back to you in 48 hours”).
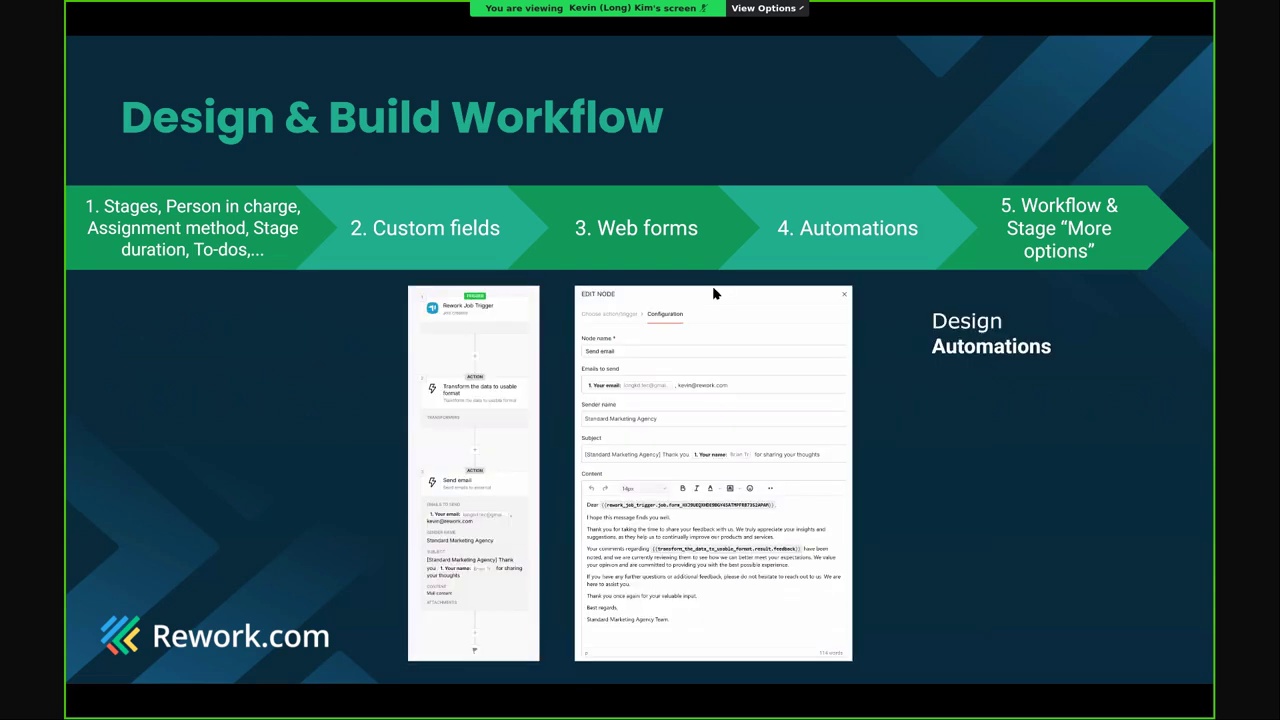
Step 4: Create Automations
Set up automations, such as sending a confirmation email when a new job is created.
You can define triggers and actions, for example, “Job created” → “Send email with custom message.”
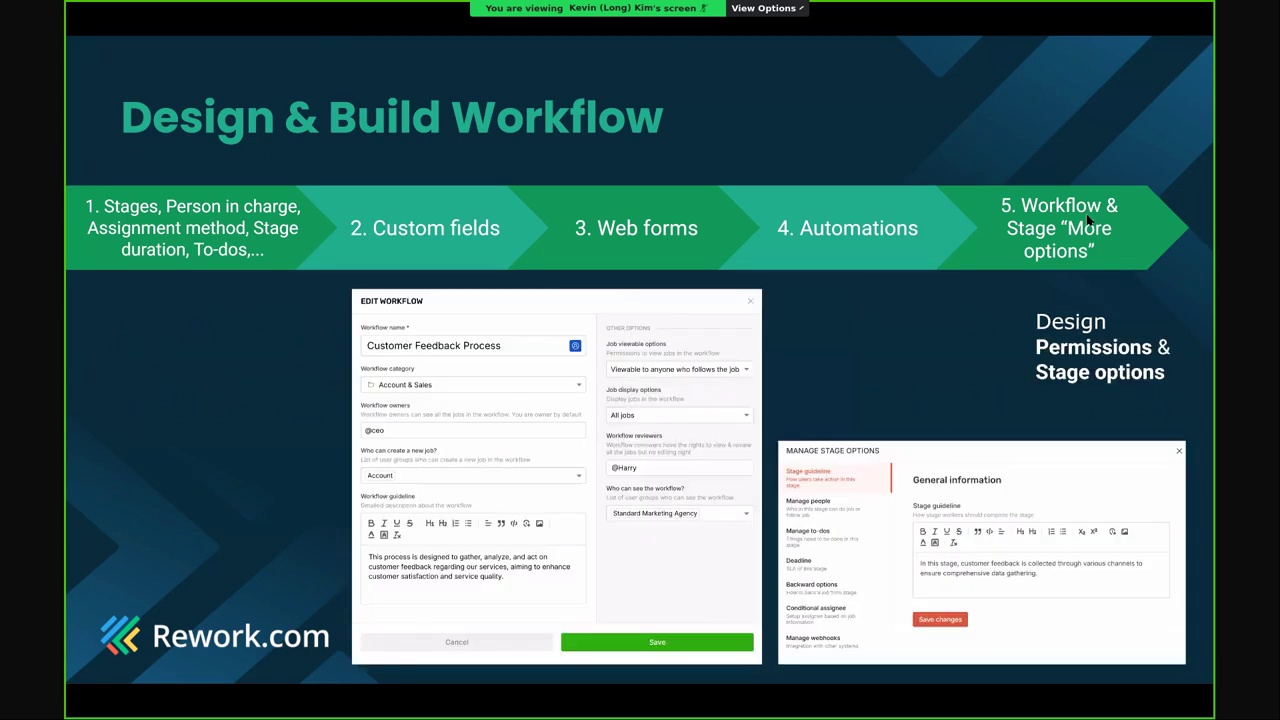
Step 5: Review and Launch
Review the workflow and form. Set access permissions: who can view, edit, or manage.
You can also add stage-specific options like deadlines, to-dos, or backward settings.
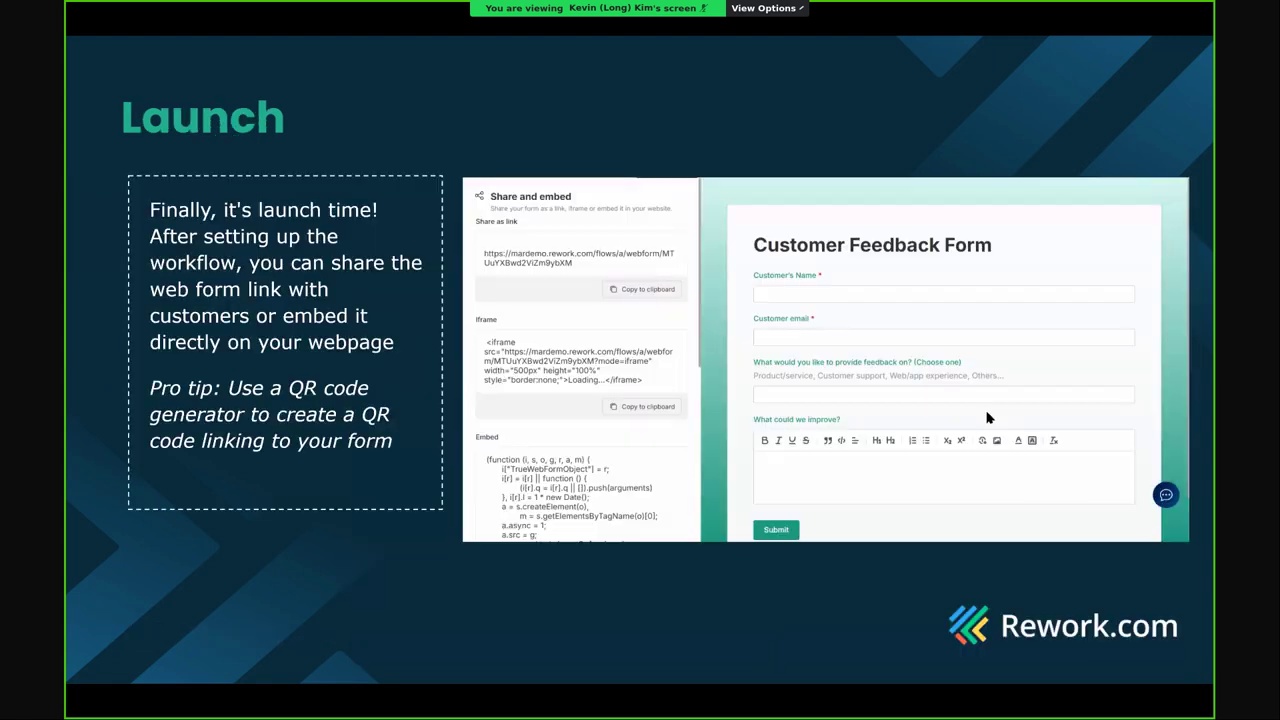
Share the Form with Customers
Copy the form link and send it to your customers.
You can share via group chat, pin it to your website, or use chatbot automation.
Rework also offers embed codes (iframe or script) to integrate forms into your website.
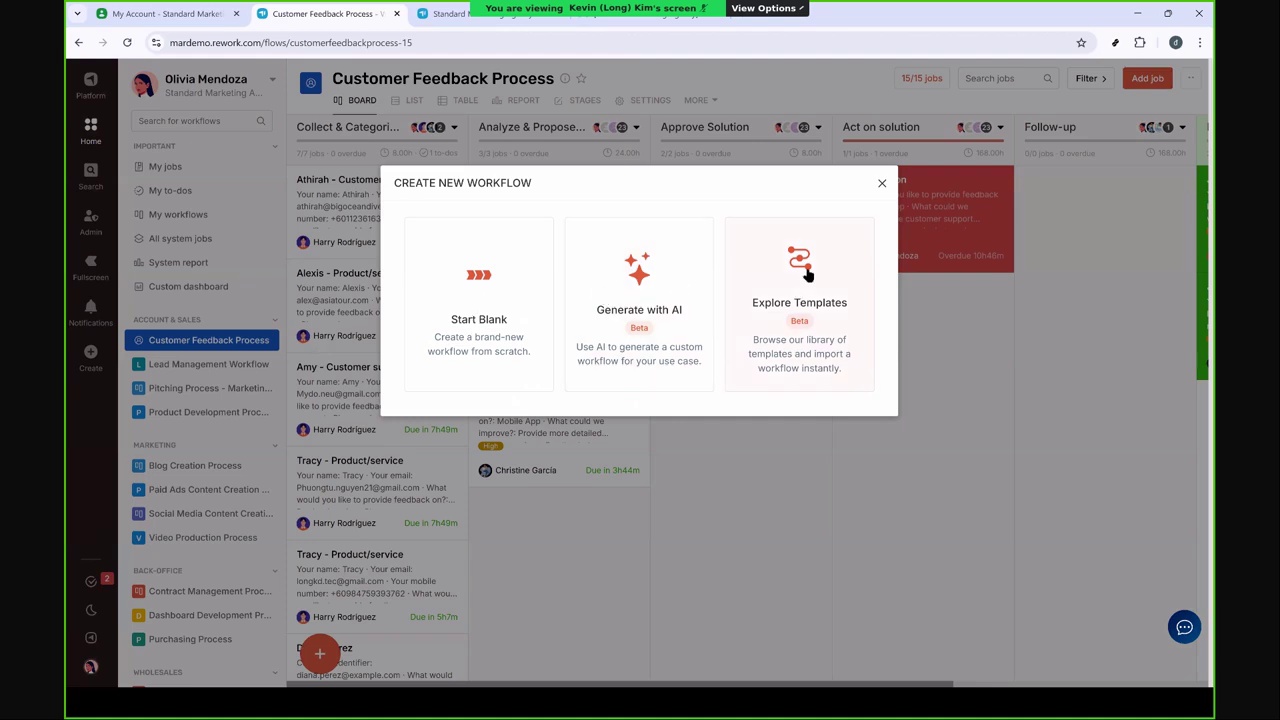
Explore Workflow Templates
Inside Rework, go to “Explore Templates”
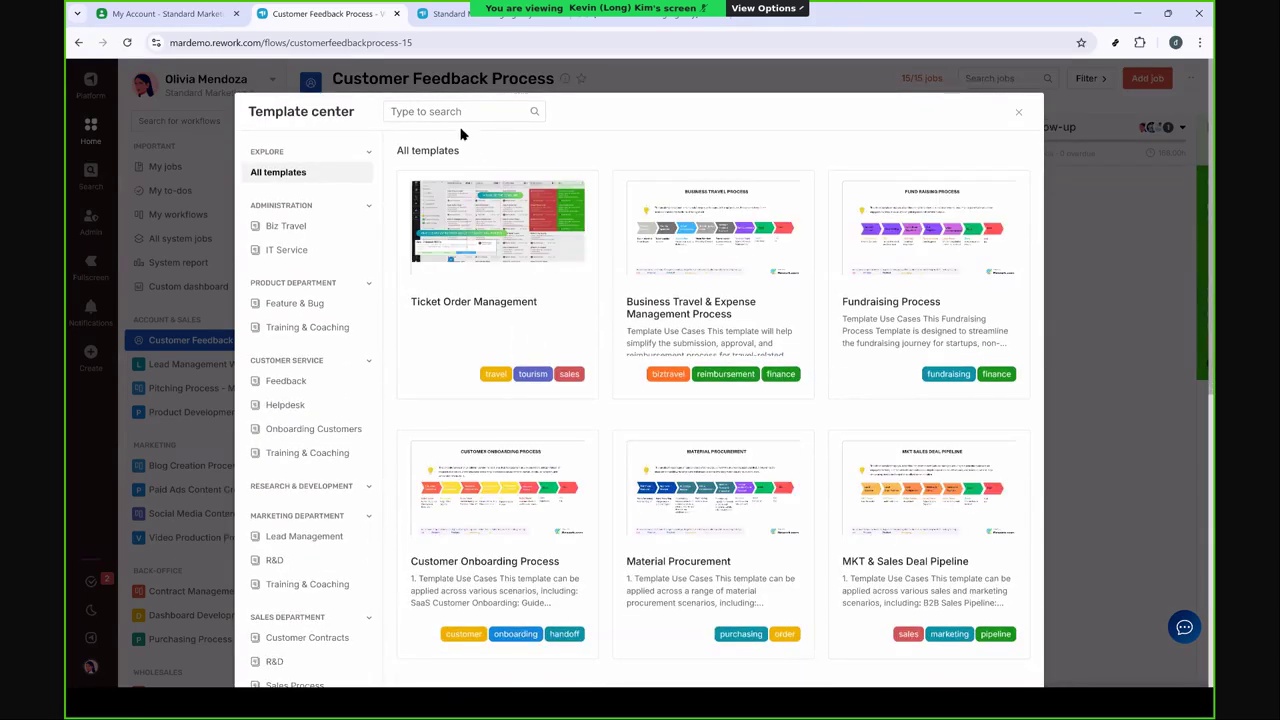
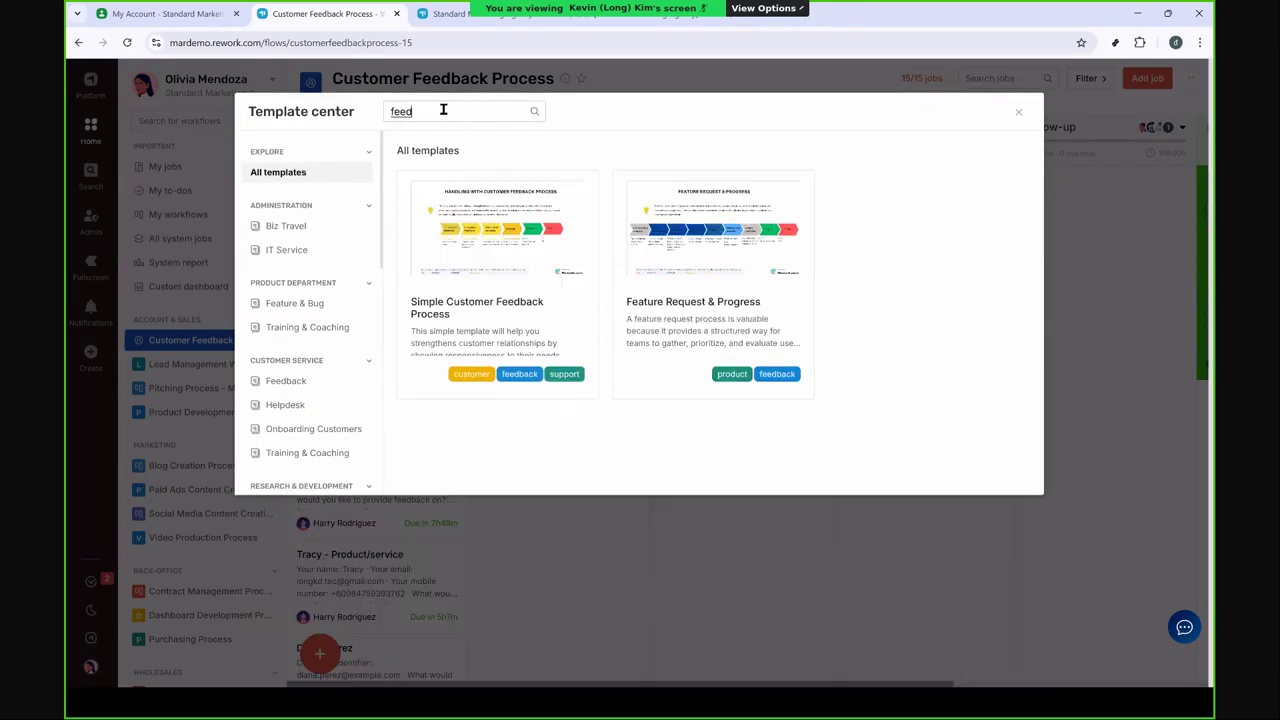
and search for “feedback.”
Select a template like “Simple Customer Feedback Process” to get started.
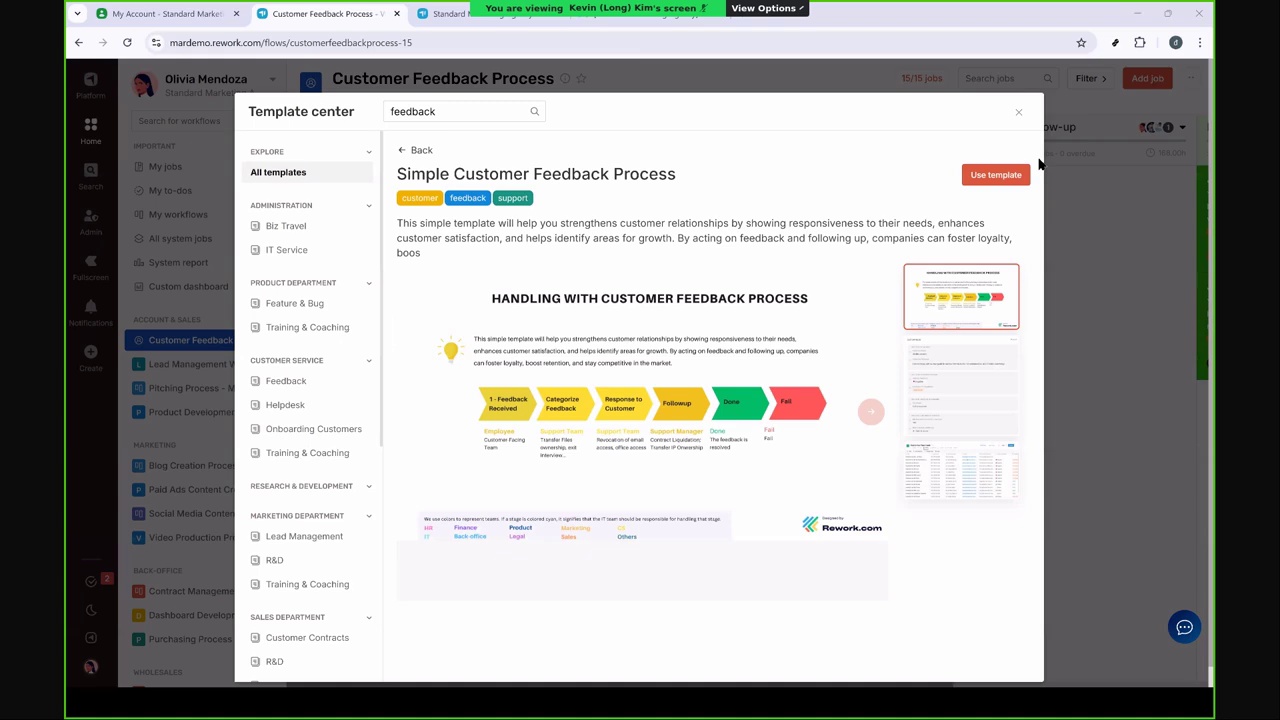
Click “Use Template,” make small adjustments, and you’re ready.
Final Thoughts
After launching your workflow, we hope you’ll gather meaningful insights from your customers.
As we said at the beginning: when customers give feedback, it means they still care.
It’s our responsibility to make them feel heard.
Thank you
That’s all from my presentation today.
We’ll send you the webinar recording, slide deck, and more details to help you set this up.
Now we’ll open the floor for Q&A—feel free to drop your questions in the chat.